[Rodney Dangerfield] I used to think that a hot mess was something like my ex-wife. Then I tried the West System 2-part epoxy! No respect! [/Rodney Dangerfield]
Another novice observation, pretty deep in minutiae of boat repair:
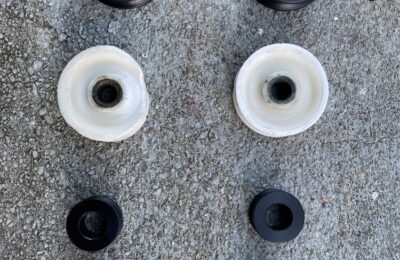
The pedestal guard serves a couple of important purposes, first as a hand-hold in the cockpit, and perhaps equally important as a conduit for wires to run from the helm into the interior of the boat. My boat came with a straight one inch diameter guard. The base of the guard covered two holes, approximately 7/8″ in my cockpit deck to allow wires (but hopefully not water) to enter my boat.
I had purchased a 1.25″ diameter guard for my upgrade, thinking that the larger diameter tube would allow easier wire transit. To fully take advantage of the increased diameter, it would be logical to drill out these holes through the deck. As I understand it, the careful man’s method in drilling through his hull is to drill out a larger hole than the desired diameter, fill the void with epoxy and then redrill the epoxy plug to the desired diameter. So, if I were to want to increase the holes here to say 1.125″ from 0.875″ I should drill them out to 1.25″ plug them with epoxy and then drill again to 1.125″. Hmmm.
The pedestal guard I ordered from Navpod came with these feet:
Burly, but rectangular, and inconsistent with the graceful swept curve of my elevated helm platform.
Fortunately, Edson supplies a more elegant alternative that nicely fits the curved deck profile:
I could re-use my OEM bolt-holes with these. Perfect!
Now, if I over-drill the central passage hole to 1.25″ to epoxy and re-drill to 1.125″ I will wind up with a plastic puck of epoxy and no fiberglass meat between the hold-down bolts and the larger diameter passageway. That didn’t seem like a good idea. I decided to leave the passage hole at the current .875″ diameter.
(Now, why had I bought the 1.25″ diameter guard if I was going to leave this narrower choke point in place? I dunno. I can make it work. I suppose 1.125″ diameter rail, or even 1″ would probably have worked just fine. I needed a new guard in all cases as I wanted an angled rail to improve visibility of the instruments, and I drew the line at trying to bend the rail myself.)
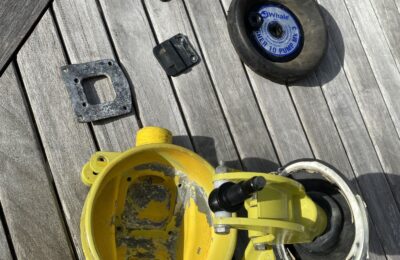
Back to the waterproofing. I still wanted to get a layer of watertight epoxy into this hole. I don’t want my deck to rot directly beneath my steering gear.
I needed a means of eliminating some of the wood core immediately adjacent to the passage holes and the hold-down boltholes. I devised a complex tool I call a Negative-Ascension-Interstitial-Lacerator, which provides rotational abrasion and material elimination. That’s kind of a mouthful, so you can take advantage of my open-sourcing of this tool design, which I refer to as a “N.A.I.L.”
Gouged out a bunch of the wood core:
Filled the space with a hot mess of West 2 part epoxy, and re-drilled the holes.
My current helm design calls for 4 wires passing through the pedestal guard holes:
SeatalkNG Backbone
MFD power cord
Wheel Pilot power cord
VHF Remote Mic connector cord
Dry-fitting:
Of these, the remote microphone cord is the only one I have had to cut to permit passage (and thus will have to re-splice on the inside of the boat). I have a plan for that, which will be part of a later post.