Inching my way along into my electronics replacement project. Logisitics delays what with the global pandemic have slowed me down and now I’m waiting for a tool to be delivered. I’m bored and thus will make an early-ish entry on the process.
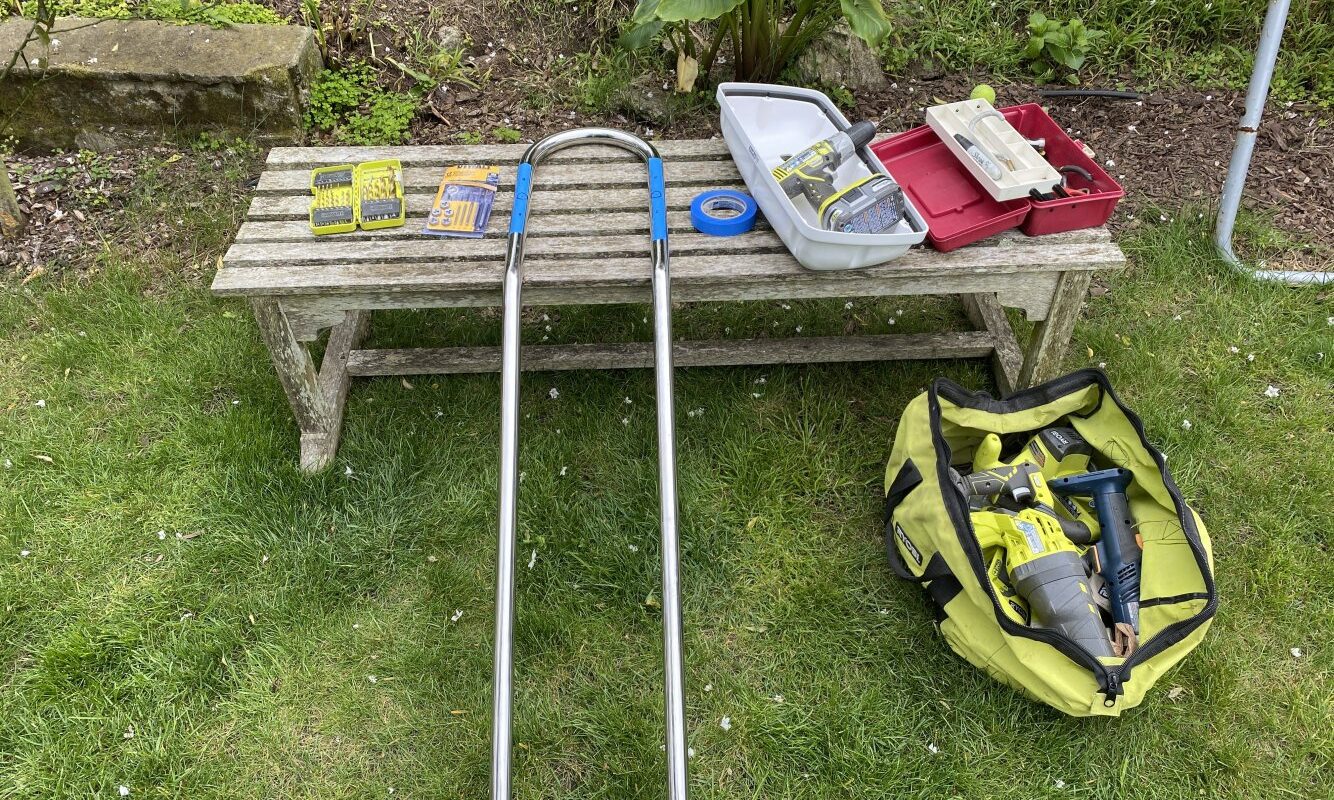
I decided to use a new NavPod assembly mounted on a single-bend 1.25″ pedestal guard. The pod and guard were finally delivered to my local West Marine which remains open as an “essential business,” thankfully. I expected the SailPod housing to be kind of a Chinese-plastic item of dubious quality. I went ahead and ordered without more research, but had I done so: https://navpod.com/about/ I would have learned that the housings are made in Oregon, and feel very sturdy in person. Expensive, but good value, I say.
There are two gaskets that seal the ‘cup’ and face portions together, one black foam one inside the box, and a second visible gray layer on the outside.
The kit also includes a set of gaskets that seal between the instrument housing and the pedestal guard:
The pod then attaches to only one side of the guard with a seal in-between providing a +/- watertight fit. This is a vast improvement over the original fiberglass box that held my instruments. There were several open holes in the pedestal guard that would allow water in.
The PIA in the DIY part is drilling and tapping the screw holes and wire-entry holes (big holes pictured in the gasket) into the shiny stainless pedestal guard, also from NavPod. I called some local machine shops and nobody wanted to mess with some guy and his stainless steel sailboat rail. I called my local boatyard and they said, “Uhh, let us call you back.” Still waiting on that.
Defaulting back to my Ryobi toolback and self-reliance. [Rodney Dangerfield] “They said put it in a bench vise so I took it to my backyard, and sat on it on my bench. No respect!” [/Rodney Dangerfield]
Pro-tip: Drilling and tapping screws into stainless steel is much more difficult than the same task in aluminum. But I managed.
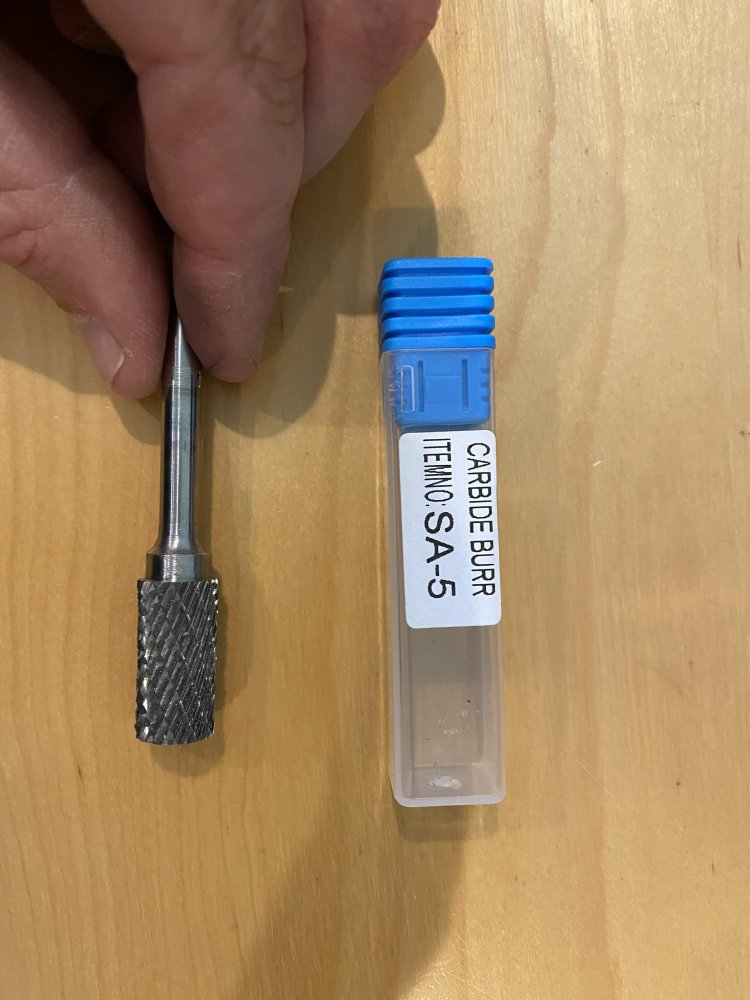
Drilling the big holes (7/8″ is what NavPod says) to run the wires through is a much bigger pain. Drift pin, pilot hole, wore down some area with my grinder, then bigger bits.
I waited for the delivery of a metal-grinding cylinder bit (YUFUTOL SA-5 Tungsten Carbide Burr Cylinder Shape Double Cut Rotary Burr File(1/2″ cutter Dia X 1″Cutter Length) with 1/4” Shank dia,Pack of 1 ). Is there a trick I am missing to drill a large precise hole in SS steel with lightweight hand tools?
The YUFUTOL $18 carbide bit I ordered on-line was effective. Scouring out from 1/2″ hole to something like 3/4″.
Completed open holes to permit passage of wires from pedestal guard into instrument housing.