The best way to remove a sailboat keel is to do so in a boatyard with specialized equipment to manage the heavy weight of the keel and the boat safely.
Step 1: The first step is to arrange the cradle for the keel under the boat.
Step 2: Loosen the keel bolts from inside the cabin.
Step 3: Lift the hull off of the keel, leaving the ballast secured in the cradle from step 1.
Step 4: Remove the keel from under the hull and secure the hull in place on adequate stands.
Again, for most sailboats with fixed keels, this work must be performed in a boatyard with a travel-lift or other adequate means of safely lifting the hull. Here is how the process worked out for my boat for a repair:
Recent Timeline:
I crashed my boat into a rock on Tuesday February 9th.
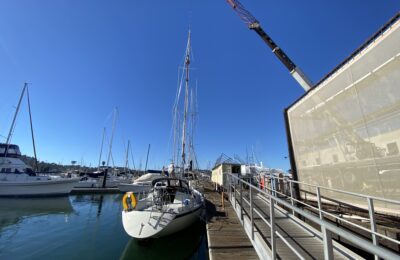
I had the boat hauled out at KKMI Sausalito on February 15th.
Upon reviewing the damage to my boat I negotiated a settlement with my insurance company and decided to “buy back” my boat as of February 24th.
I received a settlement of approximately $21K from the company which was the insured value less my deductible and the ‘salvage value’.
From February 14th to April 1st, the boatyard did not address (begin any repairs to) my boat. While the yard bills itself as non-DIY, I was able to perform a number of small rehabilitation repairs (removing and rehabilitating the quadrant, removing, inspecting and cleaning the rudder, repacking the propeller shaft stuffing box) while the boat was out of the water.
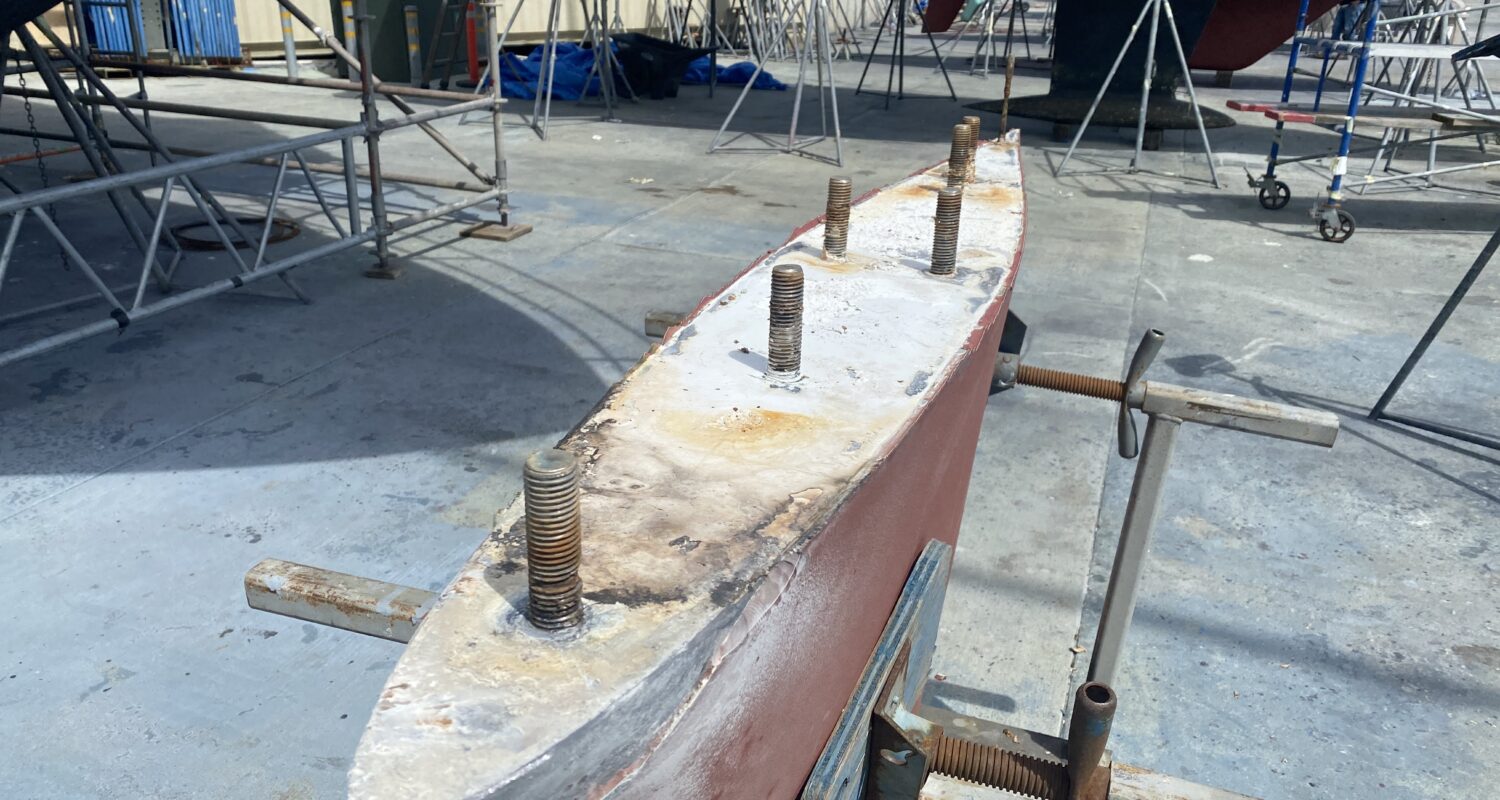
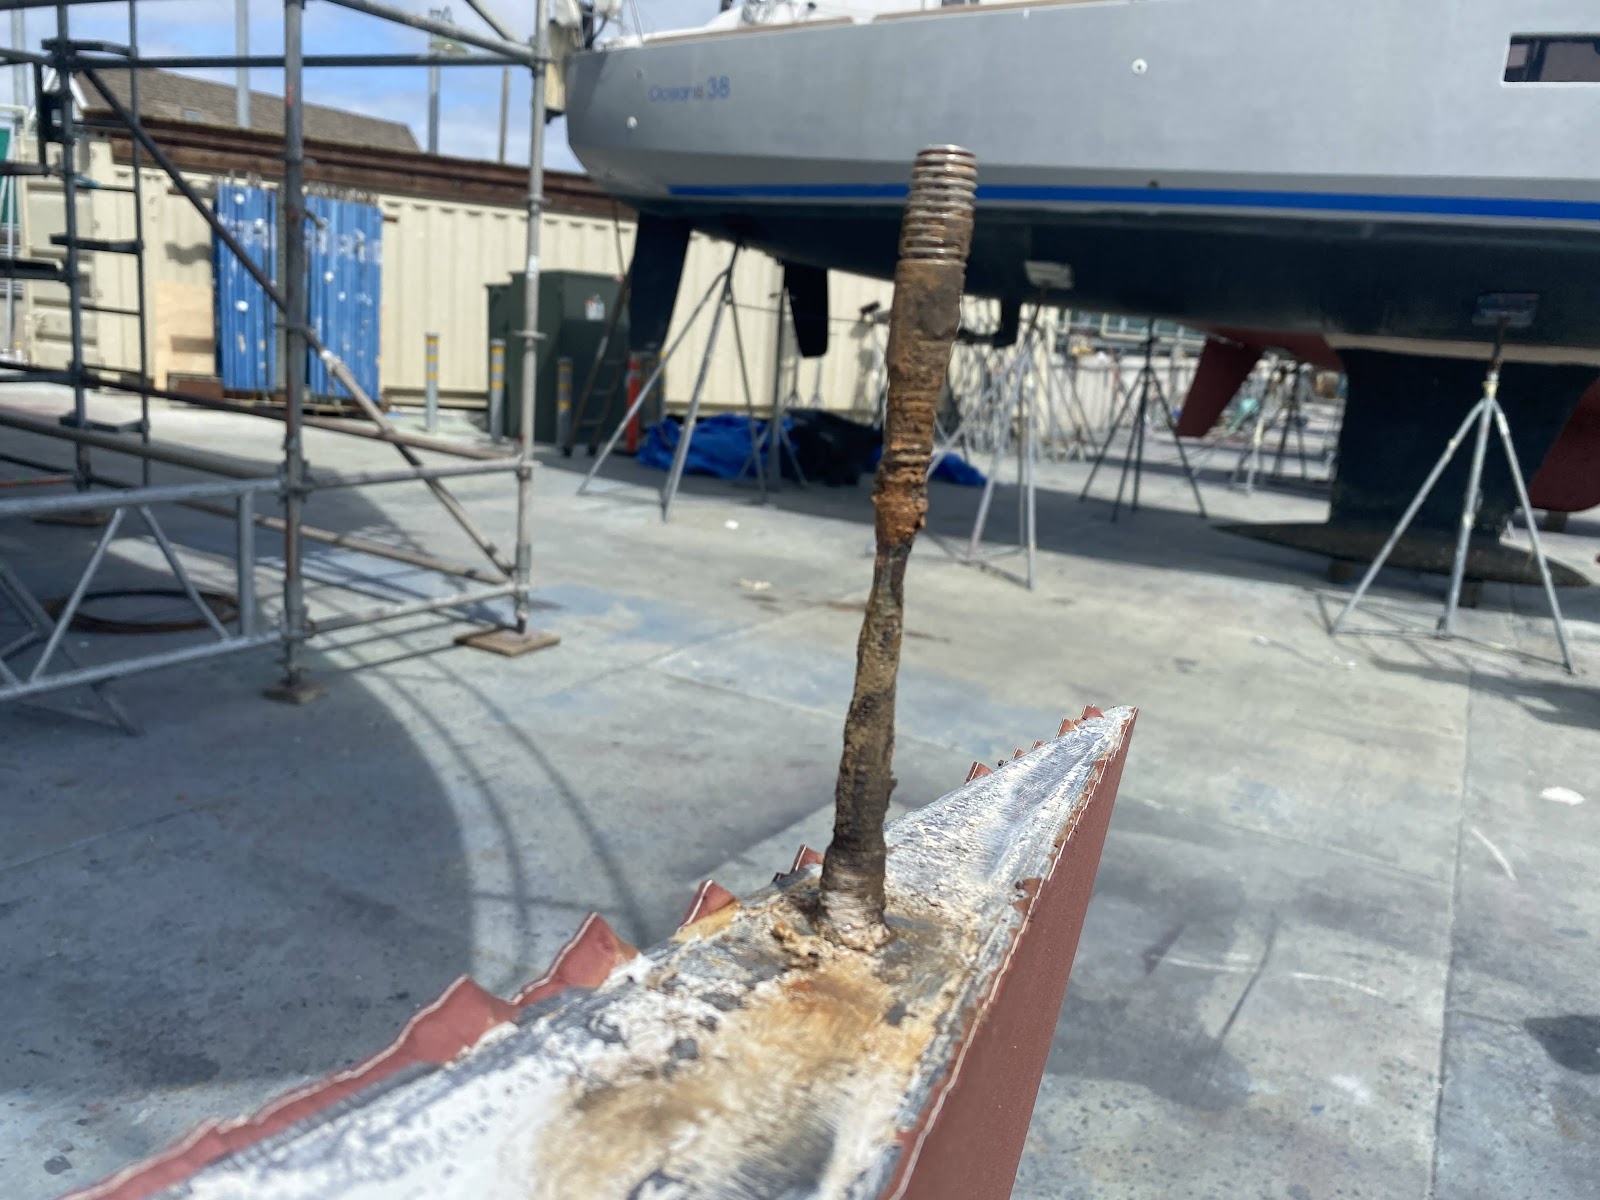
After a bit of my friendly goading, the boatyard pulled my mast and lowered my keel on April 2nd. The following was revealed:

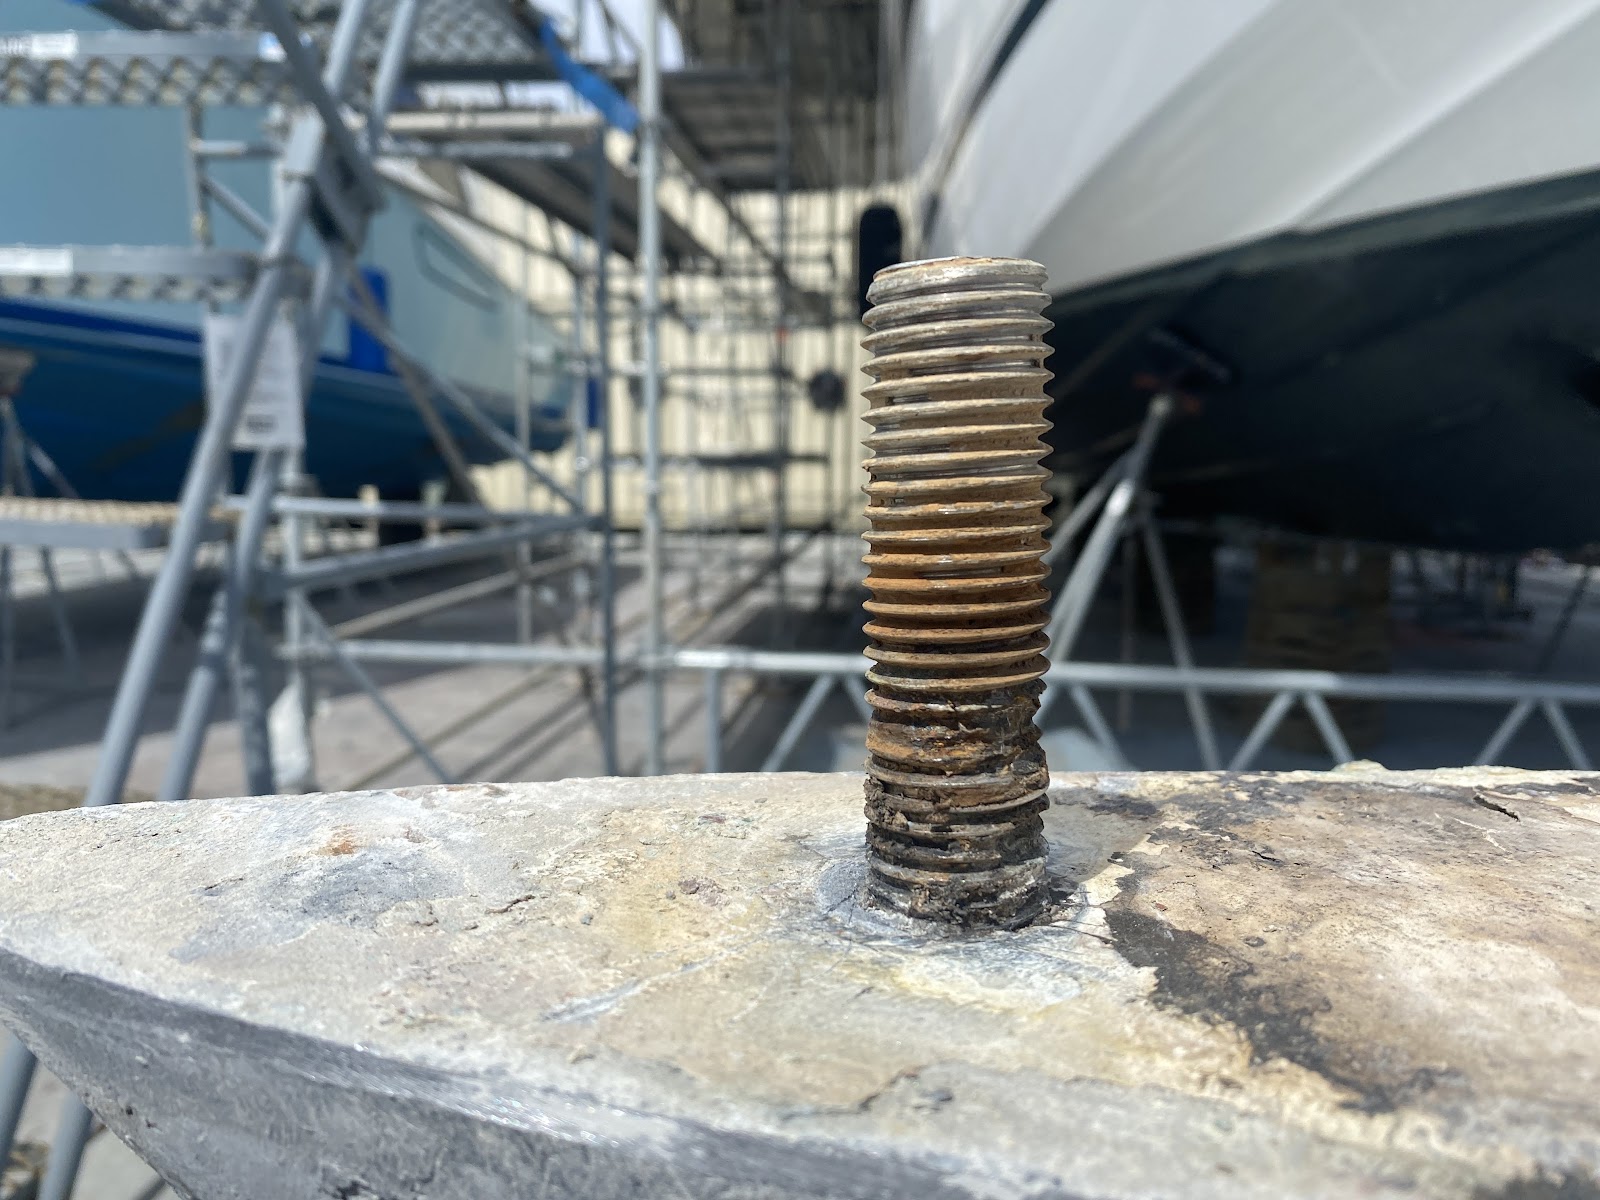
The forward, leading keelbolt had been damaged by the impact. Threads were broken and the body of the bolt was corroding. It needs to be replaced.
The other large diameter bolts spanning from the keel top surface to the inside of the grid/’Ericson Tri Axial Force Grid’ were in excellent shape.
At the trailing end of the keel in an Ericson 32-200 is a much more slender bolt that can be accessed from immediately under the companionway ladder. Mine was substantially degraded and would meet any sort of ISO or ABYC standards. This corrosion was an issue totally separate from my keel strike accident.
The plan for both the skinny aft bolt and the forward damaged bolt is to drill out the bolts, then replace them with new bolts, secured in place by inserting locking nuts drilled through the keel body. Then covering the new bolt insertions with epoxy.
As for the hull, the forward keel bolt connects only to the hull and not through the TAFG structure grid.

When the boat struck the rock, this was the outer edge of the “lever” of the keel and it exerted the most pressure. The hull cracked in the area adjacent to the forward keel bolt.
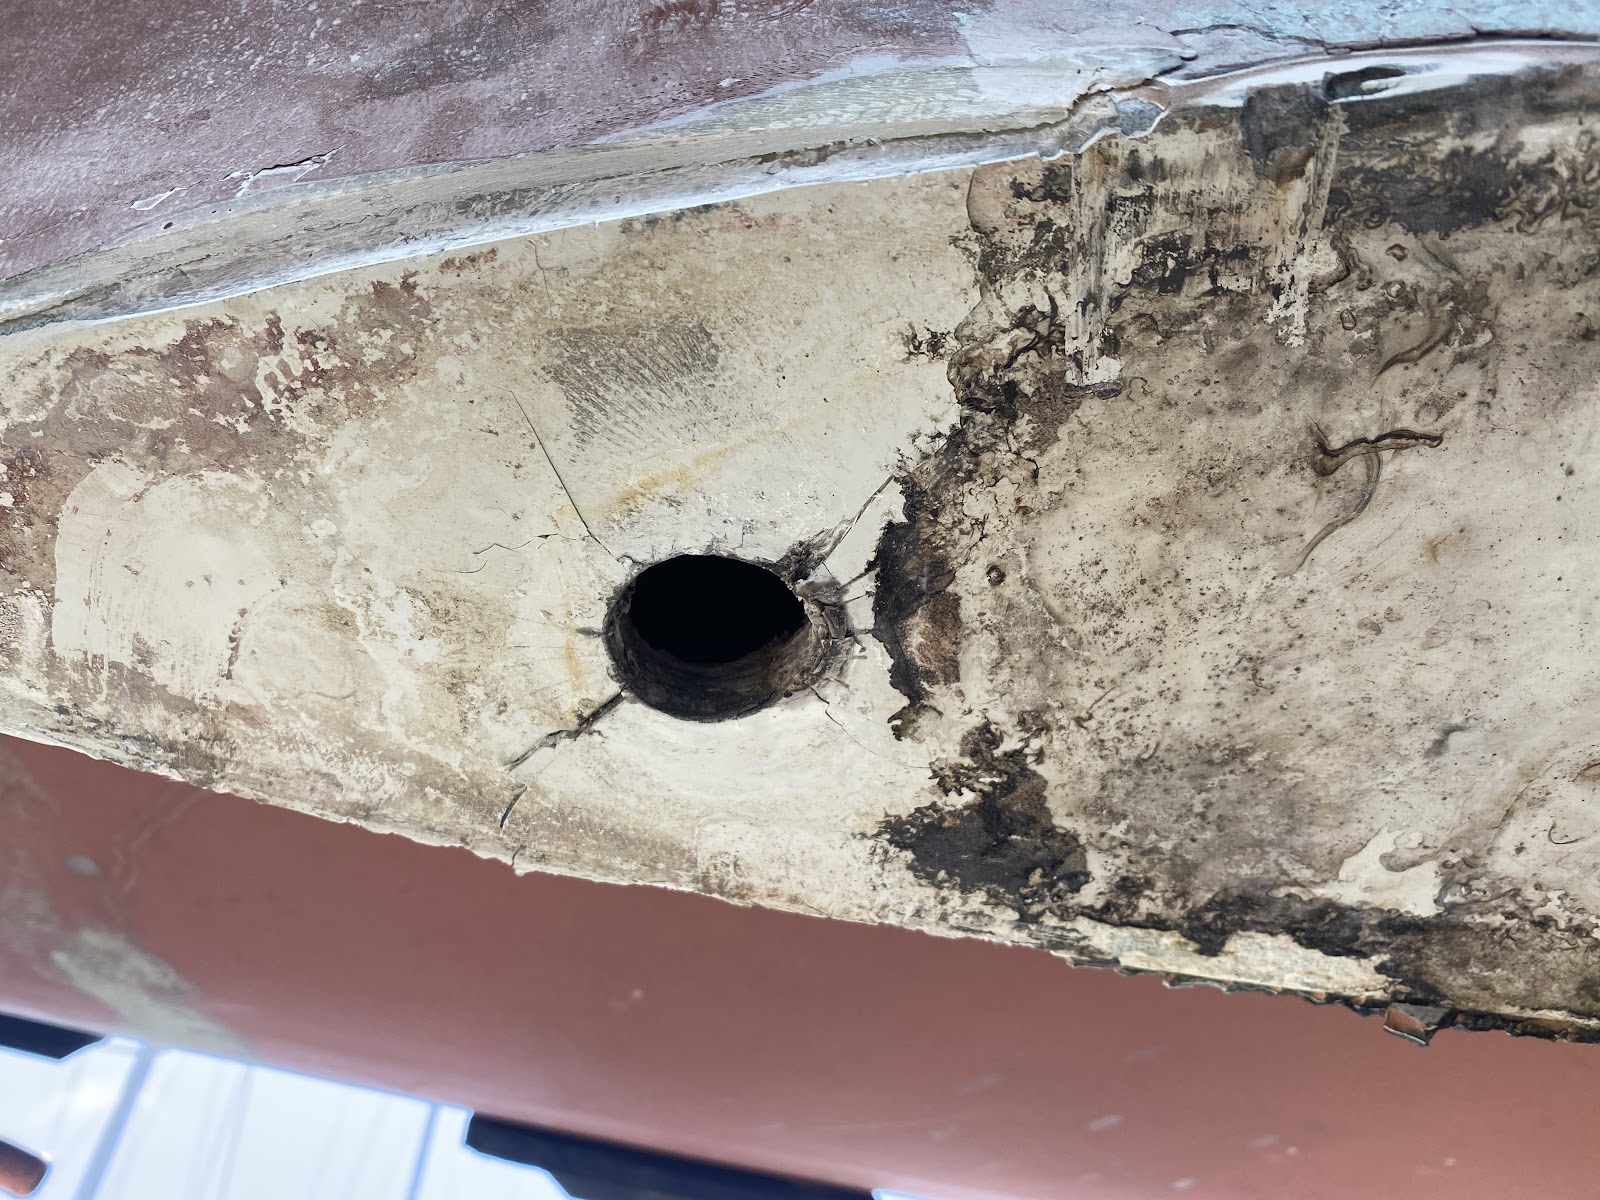
In retrospect this seems like a design issue. Why is this outermost, leading bolt connected only through the ⅝”” thick hull? It seems like a vulnerability. That said, the front keel bolt hole will be relatively “easy” to repair in that both the inside and the outside surfaces can be readily accessed.
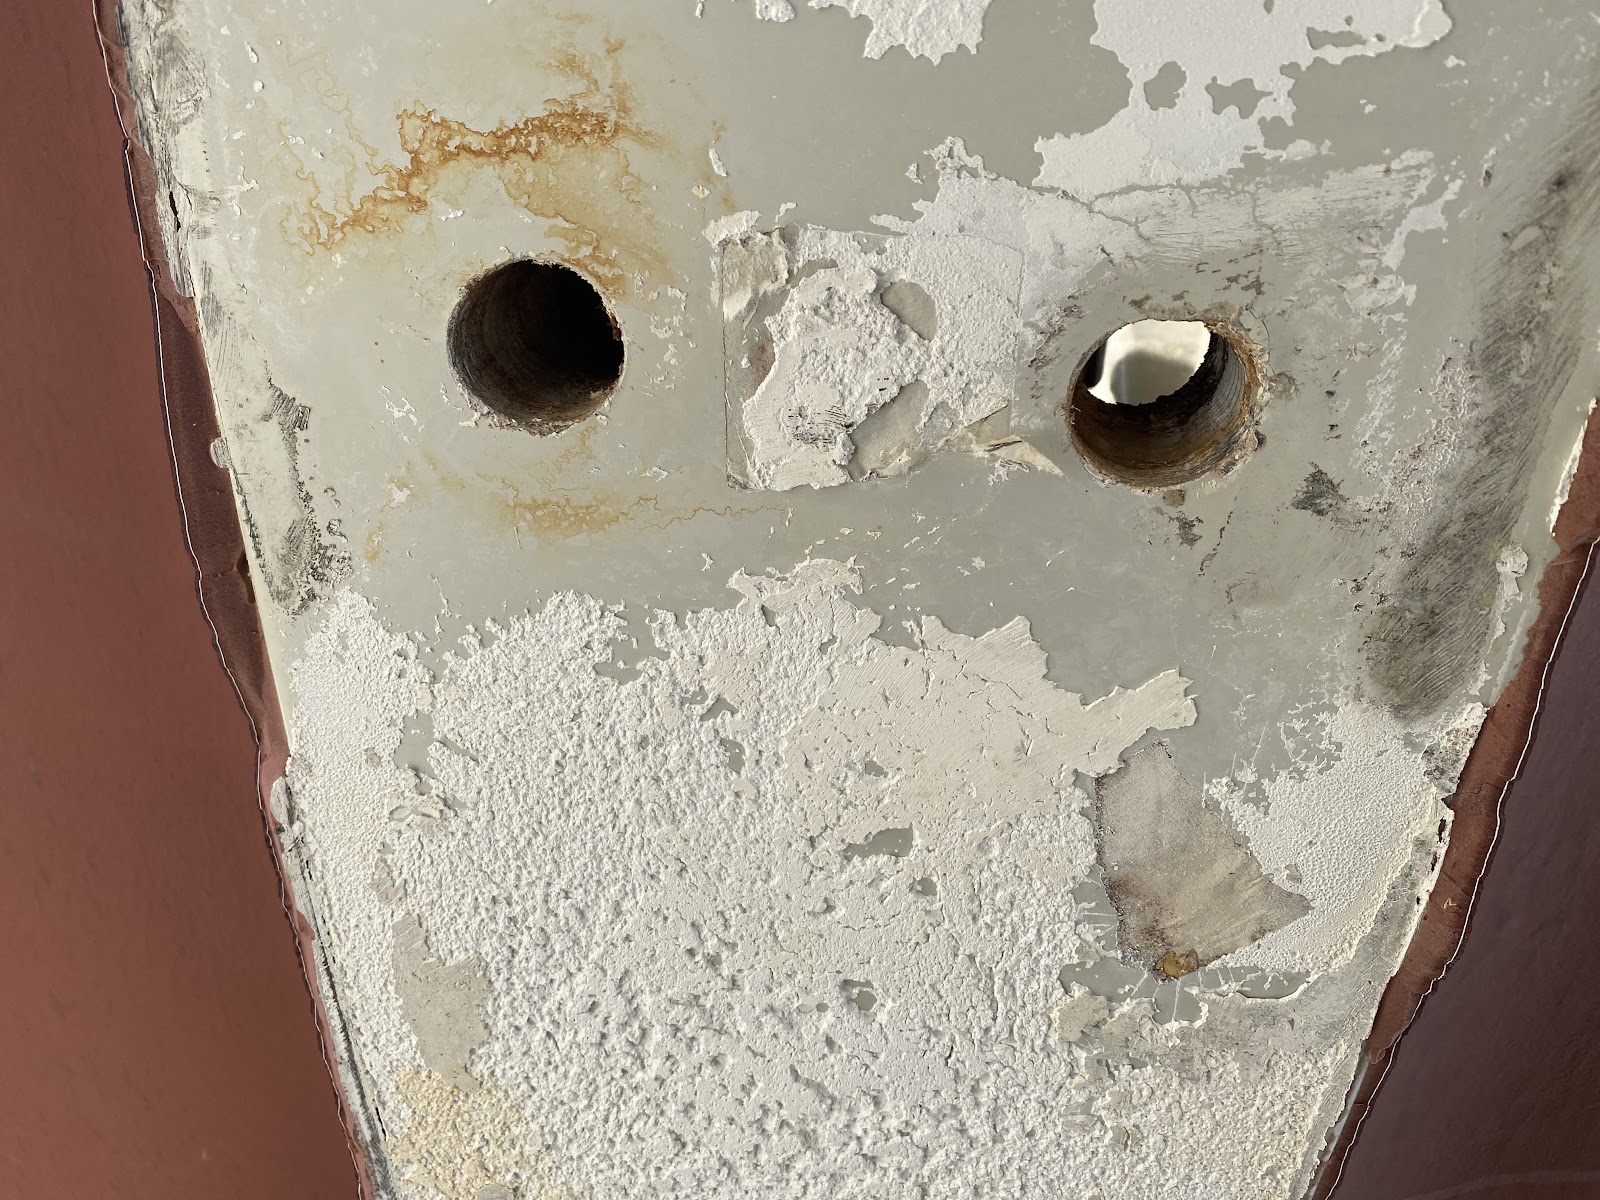
The other bolt holes (which traverse both the hull, keel stub, and the TAFG for a total fiberglass sandwich much closer to 1.5 or 2 inches) exhibit no similar damage.
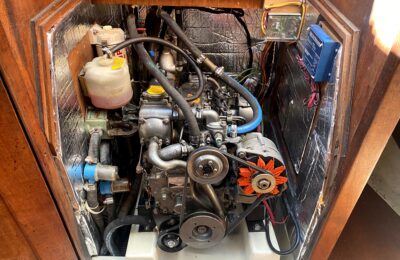
A next step will be to start to grind off the paint and fiberglass around the aft end of the keel stub. Accessing this area is problematic and may require removing the engine. I am not sure if even removing the engine will permit access from the interior side as I think a large stringer is directly above the damaged portion.

I risk angering the gods by voicing such an opinion, but I have been gradually coming round to the stance that my boat is, and has always been an Ericson. It’s built pretty well, so that even if it’s run into a rock, the boat will survive in decent shape.
We shall see at the end of the story.