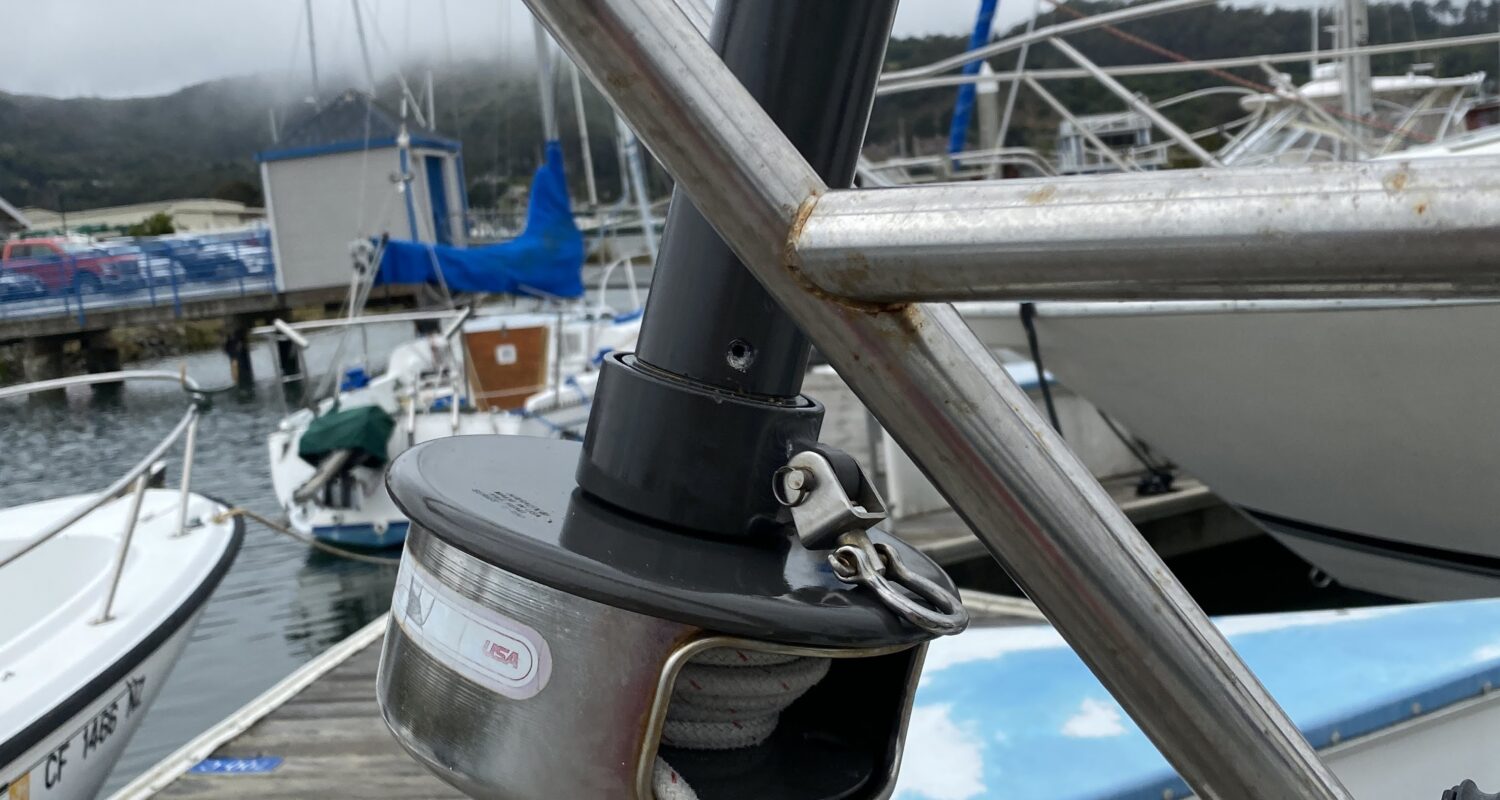
In the process of replacing all the standing rigging on my boat, I had the wire forestay/jibstay replaced as well, with a new cable fitted into my Harken Mark 1 Furler. I have added some tension in my initial “dock-tune” and it seems to be working well enough.
Given that the furler both serves both a structural role (containing the turnbuckle with which one tensions the forestay) and a dynamic one (permitting use of the furled headsail), it seems worthwhile to understand and care for a furler. The good news is that my unit came with a 5 year warranty! The bad news is that it has been in service for about 30 years. Hmmm.
Overview
I sort of wish that I had hovered over the rigger in the boatyard who disassembled and then re-assembled my unit, but I did not. The exploded parts view is something of a substitute.

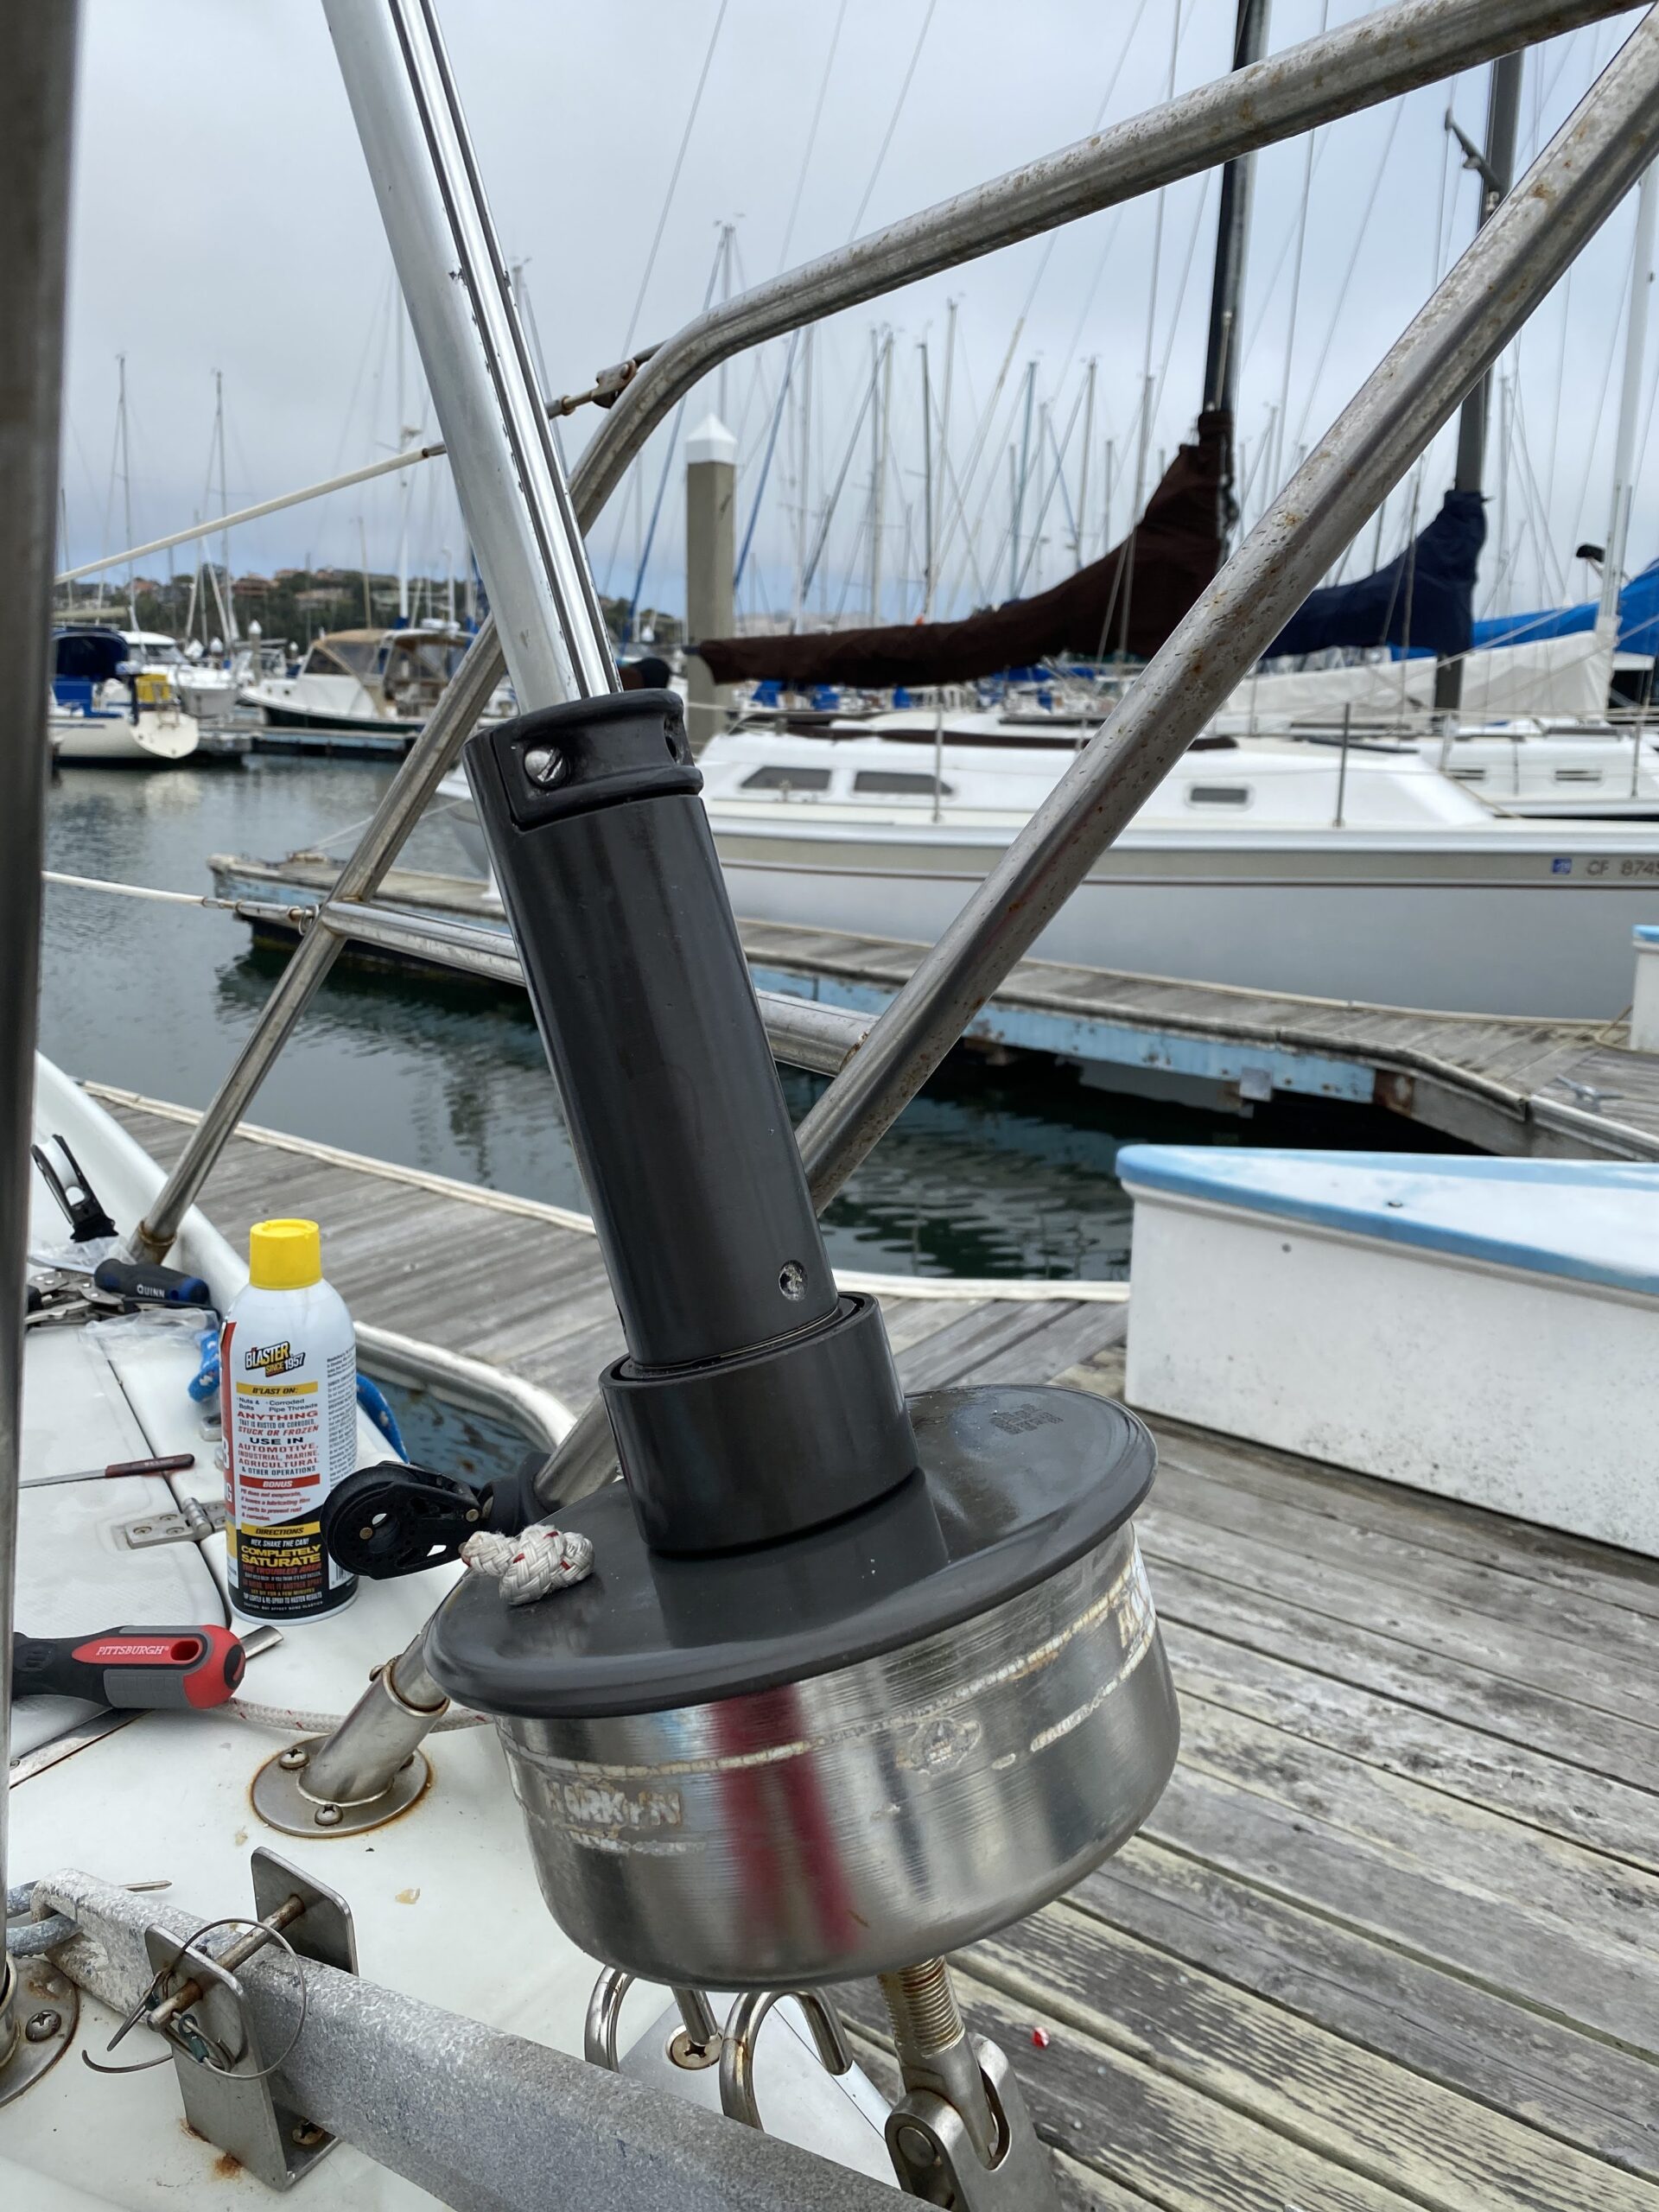
Tensioning the Furler
If that exploded parts diagram is a bit hard to read on the blog site, here is a more palatable, very late-1980’s instructional video from Harken on tensioning the furler:
The video does a better job with narration than I can do here with words. I followed their instructions. It’s important to understand how the upper and lower locking nuts must be loosened before adjusting tension in the turnbuckle.
Here is another good troubleshooting video from Harken:
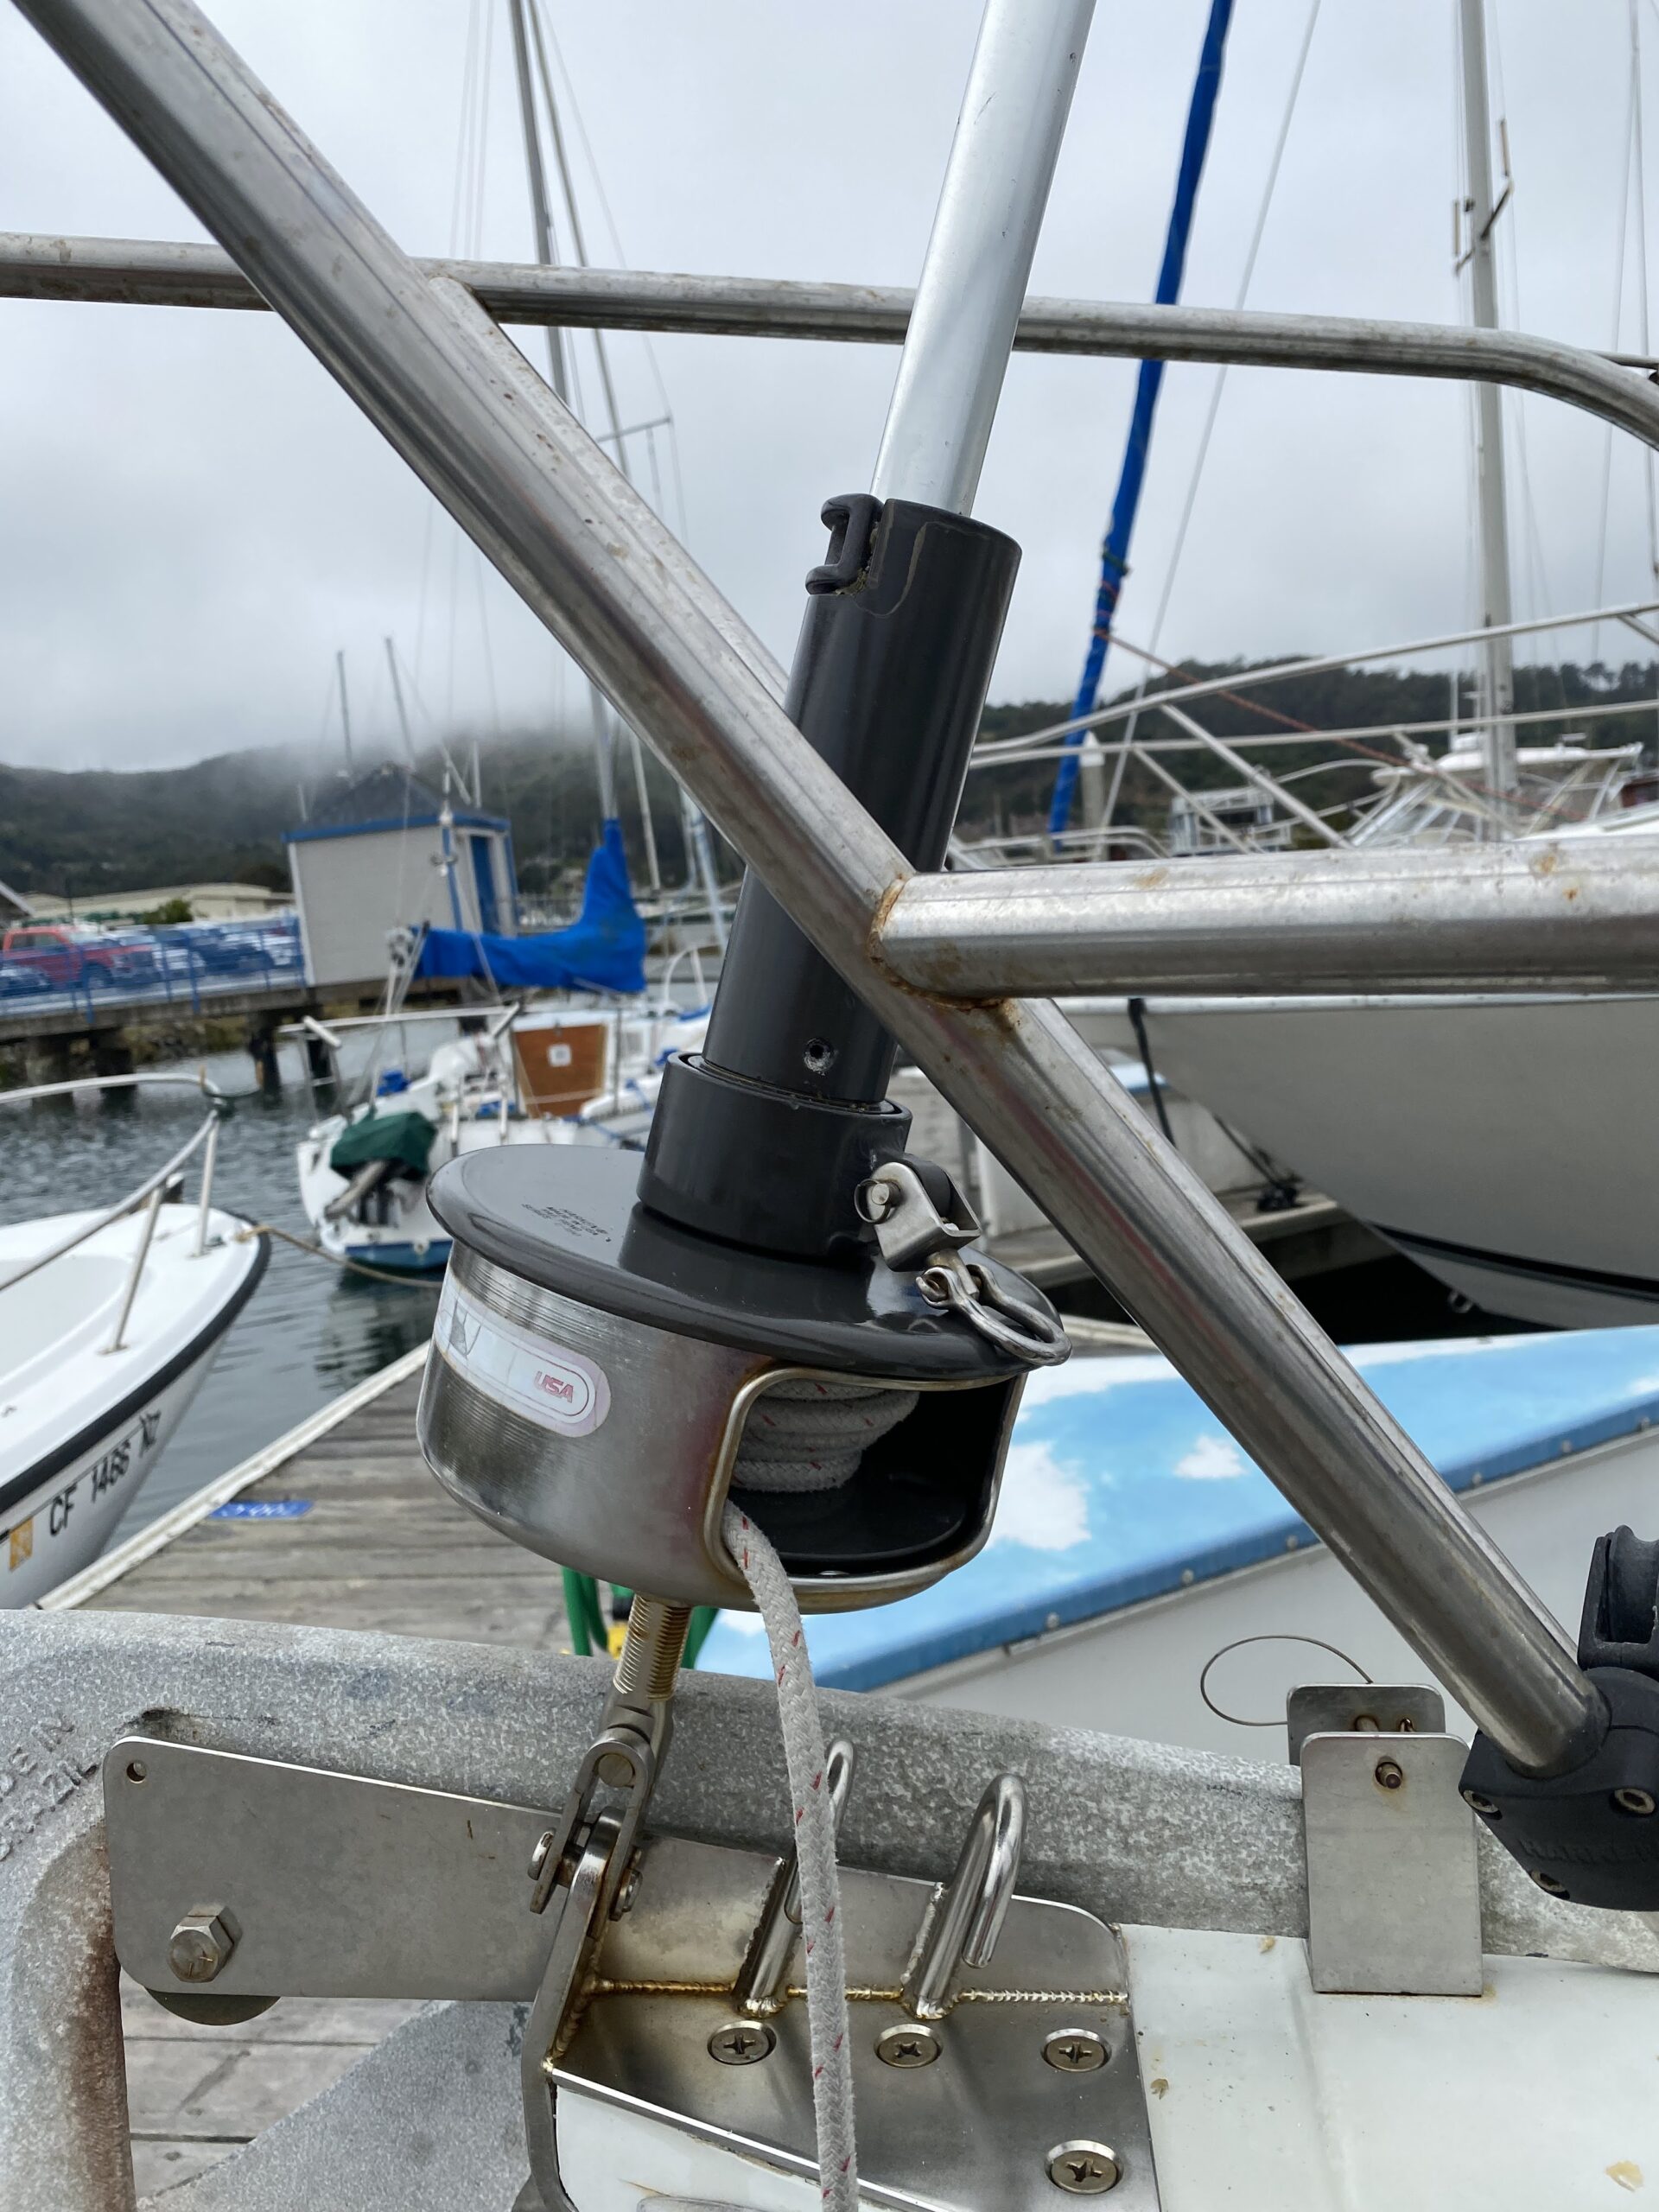
Furling Line Rigging
Getting the furling line back in the furler is straightforward, and easy if you have taken pictures of how it should go on. The basic steps are:
- Remove the sail from the furler.
- Thread the furling line through the hole in the top of the furling drum and tie a stopper knot. Mine had only an overhand knot when I found it.
- Still with the sail off, rotate the drum the correct number of turns that furling your sail completely will require. If you don’t know how many turns that is, you may (as I did) need to raise your sail, furl it, counting the rotations. Then take the sail off, and wind the line onto the drum. When in doubt, I think it is better to wind on a couple of extra rotations of line.
- You must also wind on the line in the correct direction. The rope winds from the side of the boat opposite of the UV cover of your sail. The line must go toward the front of the boat. I write all of this in detail because I am embarrassed at how long it took me to puzzle through it, when I should have gone back and found the picture I took 3 months prior.
- Now that your furling line is properly coiled into the drum with sufficient rotations, you can raise your sail, and pull the line out of the drum to furl the sail for storage.
This tensioning of the furler, and then re-rigging took me about 2-3 hours. I will be faster, I hope the next time having learned how to do it.