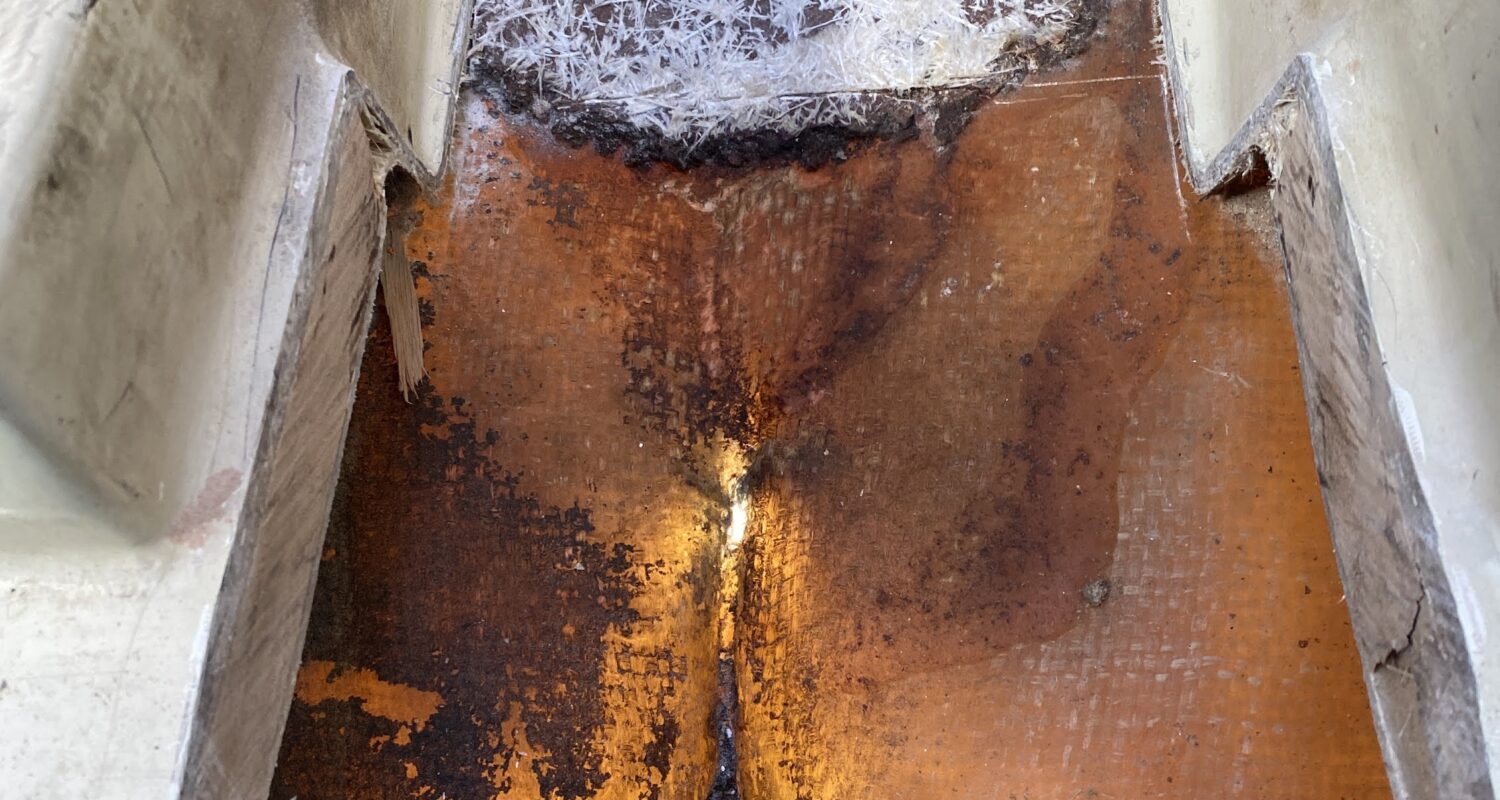
After pulling out the engine of my boat, my friendly local boatyard has now made an incision in the hull grid (Ericson: Tri Axial Force Grid) and created an access point for fiberglass repair work made to the inside of the aft portion of the keel stub. Here’s what it looks like:
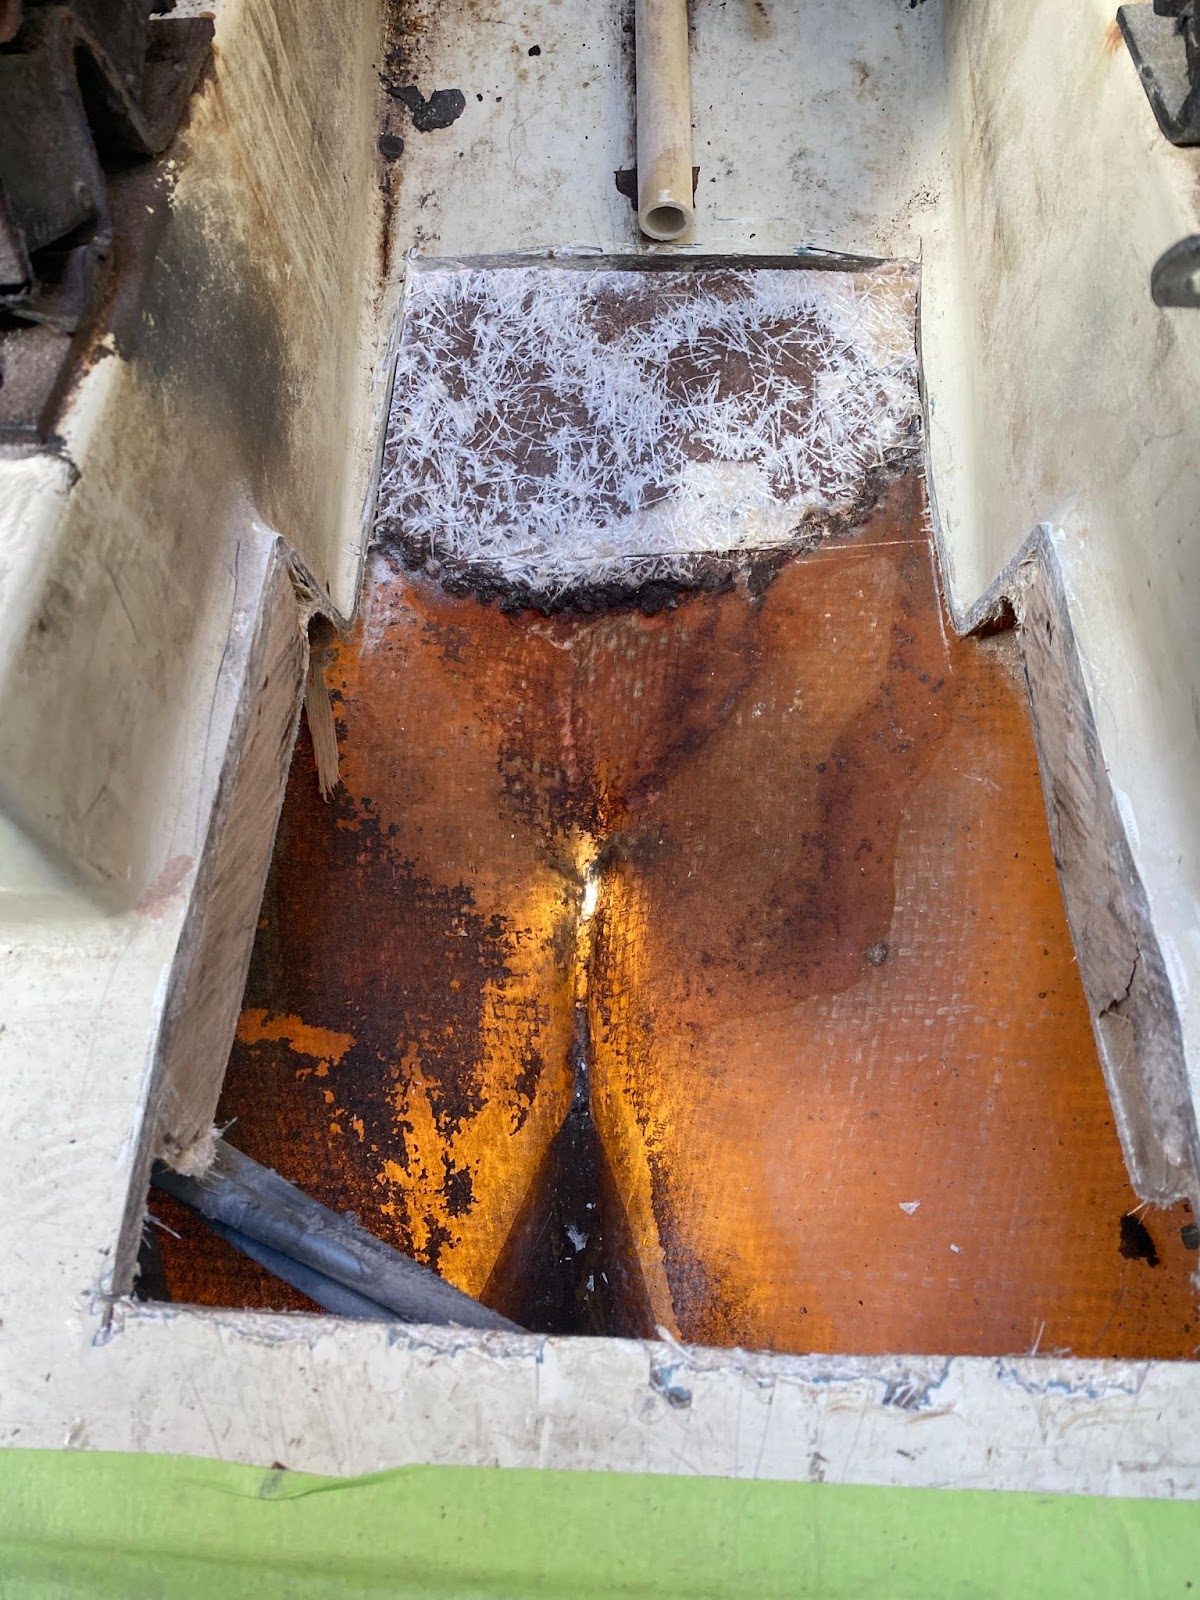
Despite bashing the ever-loving-mother-truck out of the keel, there was not only very little damage to the grid structure, but no visible damage to the hull itself on the inside. The surface must have flexed, but the boat maintained enough rigidity such that there are no visible broken fiberglass fibers, no cracking, and really no damage, save for the sunlight entering where the exterior hull grinding penetrated the hull.
These conditions raise the uncomfortable question, “Uhhhh dude? Why did you make me take my engine out and cut my boat apart if the fiberglass we are accessing is actually just fine?”
The first answer is that we did not really know what the condition of the inside of the hull fiberglass was without getting proper access to see it.
The second answer is that, per the boatyard, we need to grind into this good glass to make an adequate bond with the similar repair that will be effected from the outside of the boat. The combination of the repair of the interior of the hull and the exterior will create a strength sandwich of sorts. The plan as of now is to:
- Grind out existing fiberglass.
- Lay repair layers inside.
- Add in ‘Structural Putty’ (like colloidal silica in epoxy, but not exactly)
- Add layers of glass on top of the putty.
- Once the inside is complete, begin work on the outside of the boat.
Here’s what the sandwich of materials that were cut out from the engine pan area looks like:
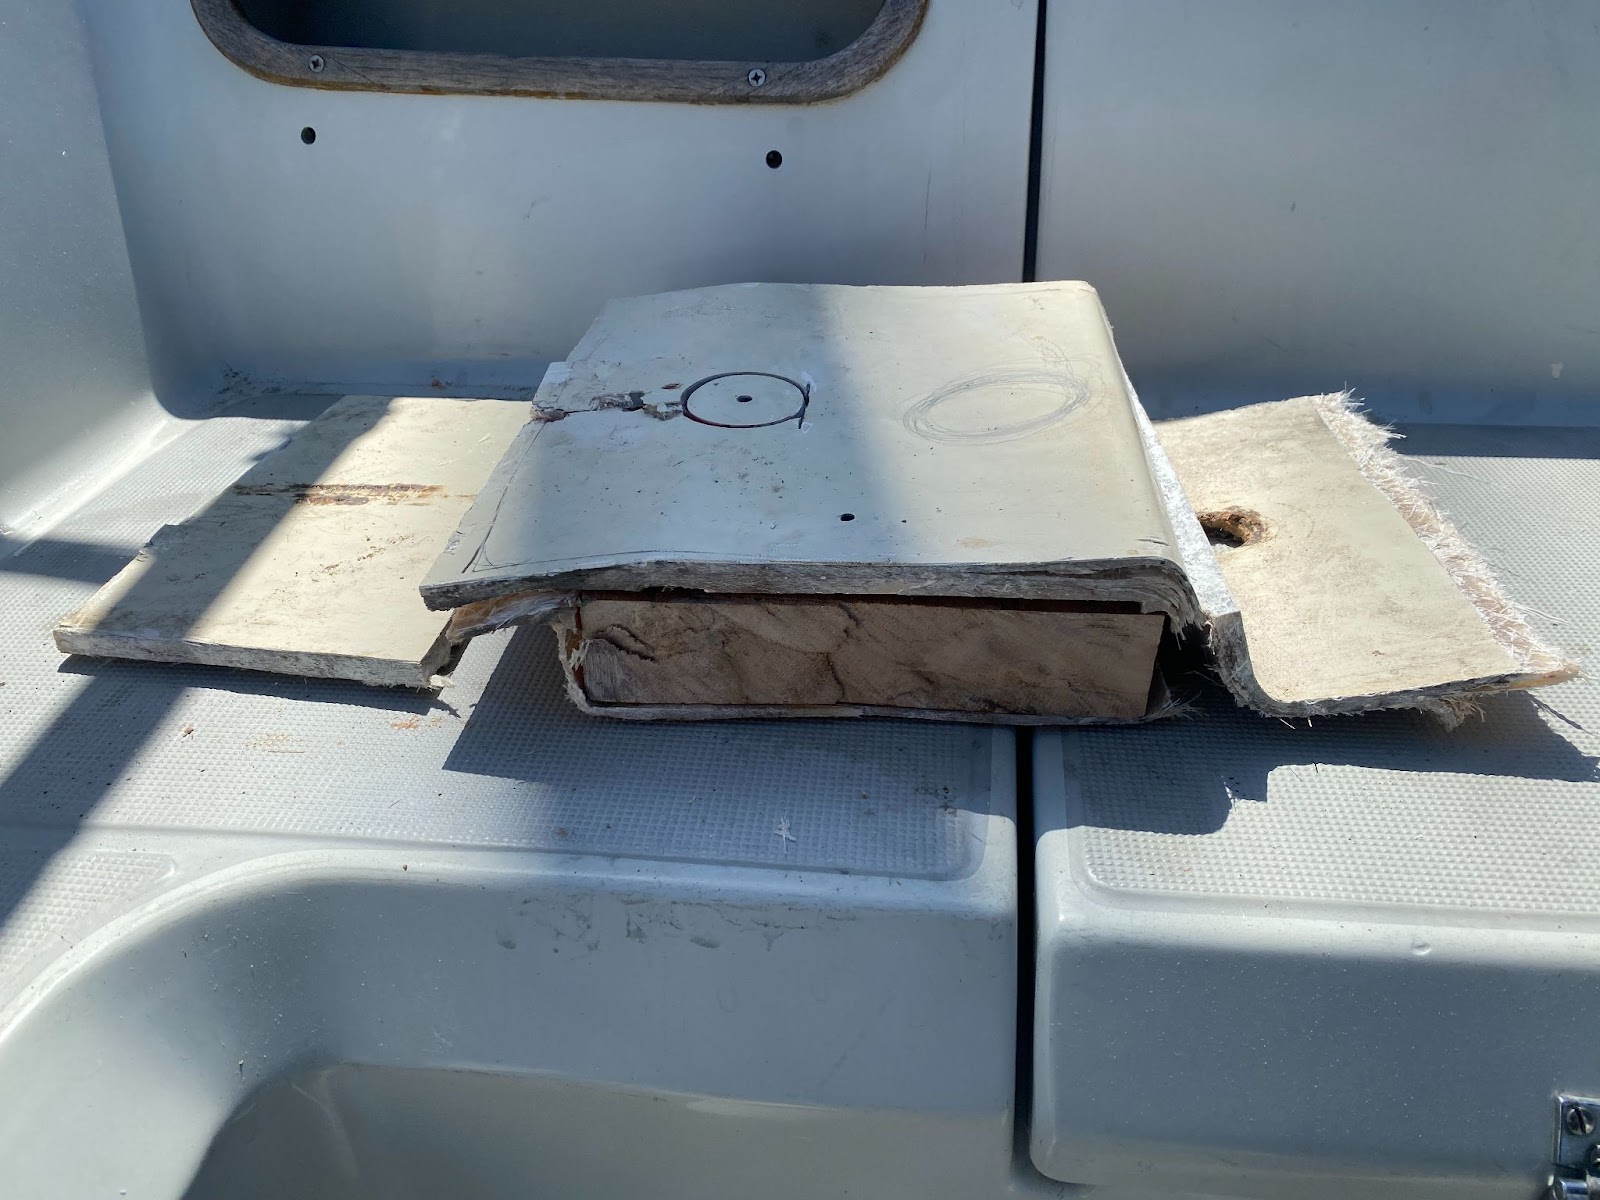
The wood stringer/member laid sideways connects the engine mount stringers side-to-side to reduce vibration and will have to be replaced. Exact process is as of yet undetermined.
Hoping to be back in the water by June 15th. It’s really taken far longer than I anticipated.
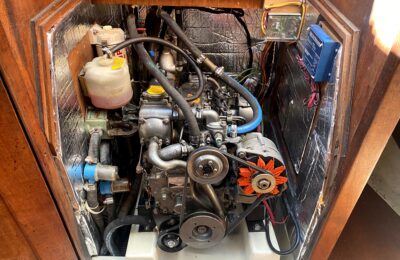
In the meantime, some engine work/inspections:
Heat Exchanger Partial Disassembly and Inspection
Here’s the front side of the heat exchanger. The center copper core is a cylinder that can be slid out and removed, but I see no need. Every hole is 100% daylight. I don’t know if it relates to how my engine is arranged (drains well by gravity after use?) but there does not seem to be much of a problem with corrosion.

The end caps looked like this after I scrubbed them out with some vinegar and a wire brush. I bought replacement gaskets at List Marine in Sausalito.
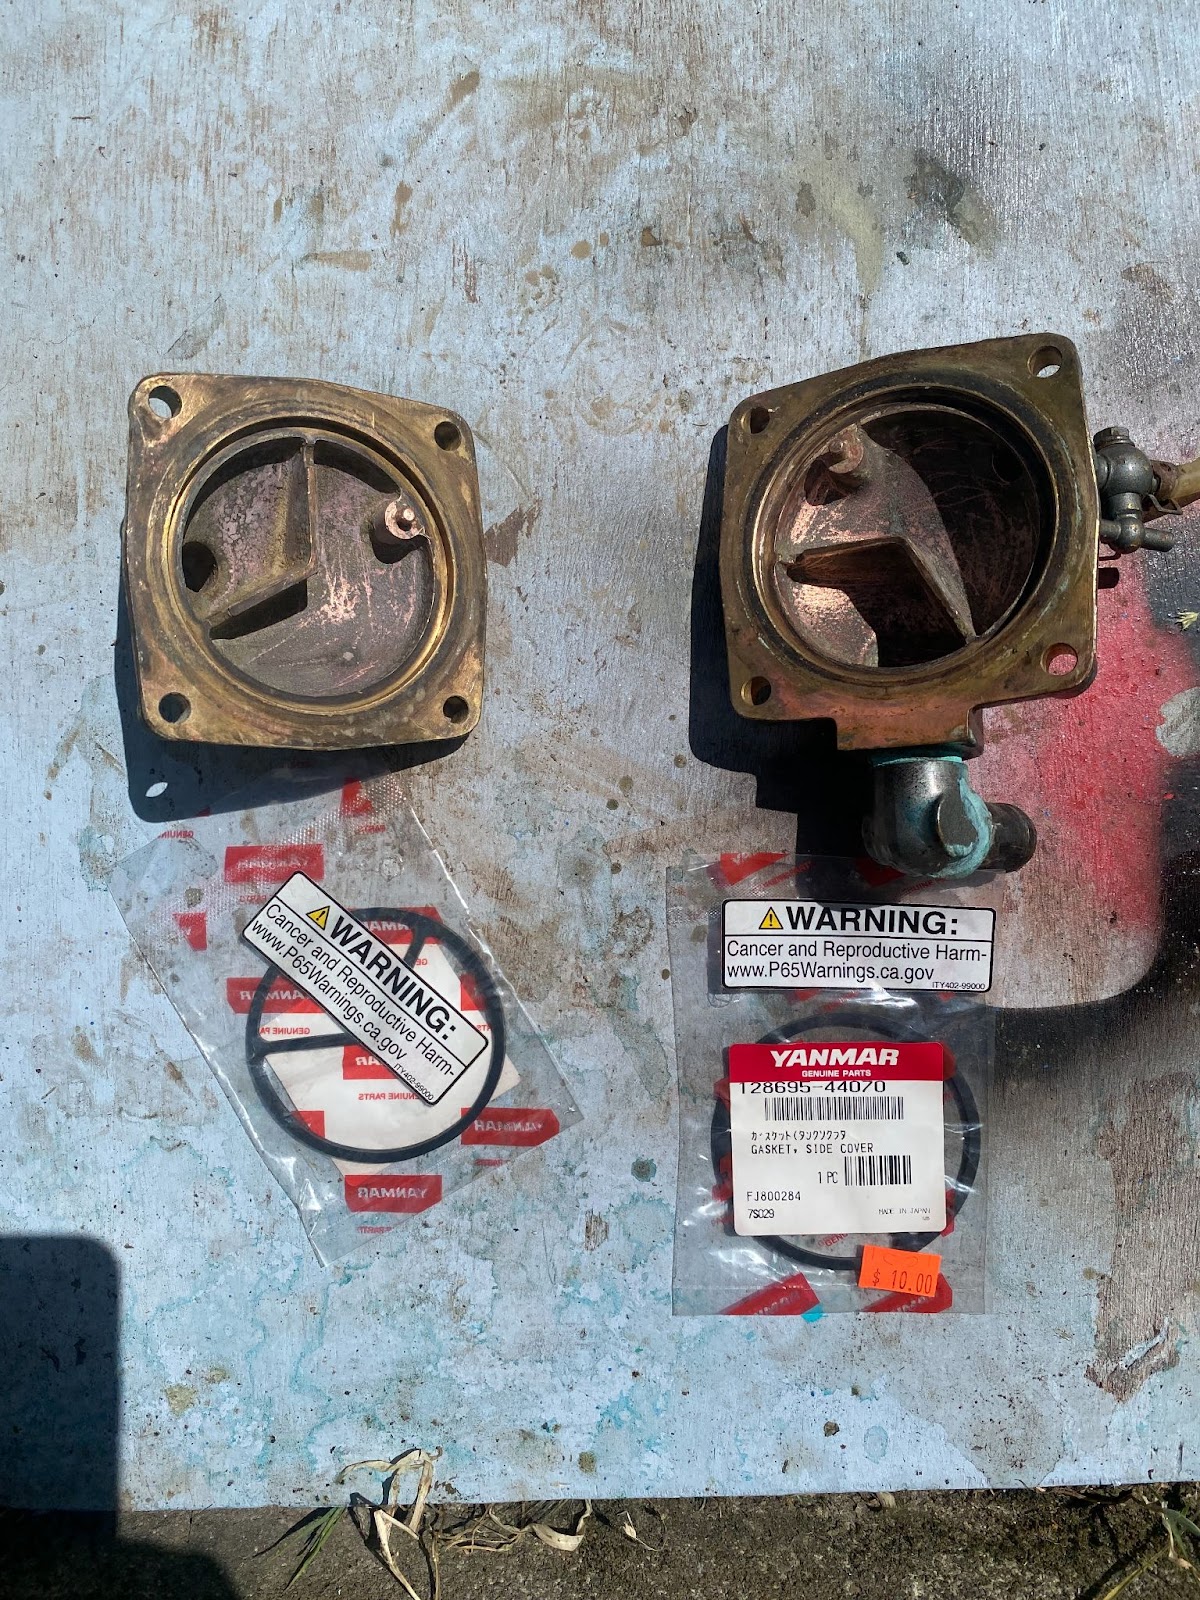
The heat exchanger has ever been a problem, so this inspection finding everything in good shape is as expected.
Exhaust Elbows
I also removed my exhaust elbow. It was easy to unbolt the dry (lower) elbow from the block. I brought the whole assembly home. There are some horrific photos of clogged Yanmar wet exhaust elbows on the web. The inlet and outlet of the assembled wet and dry elbows look fine.
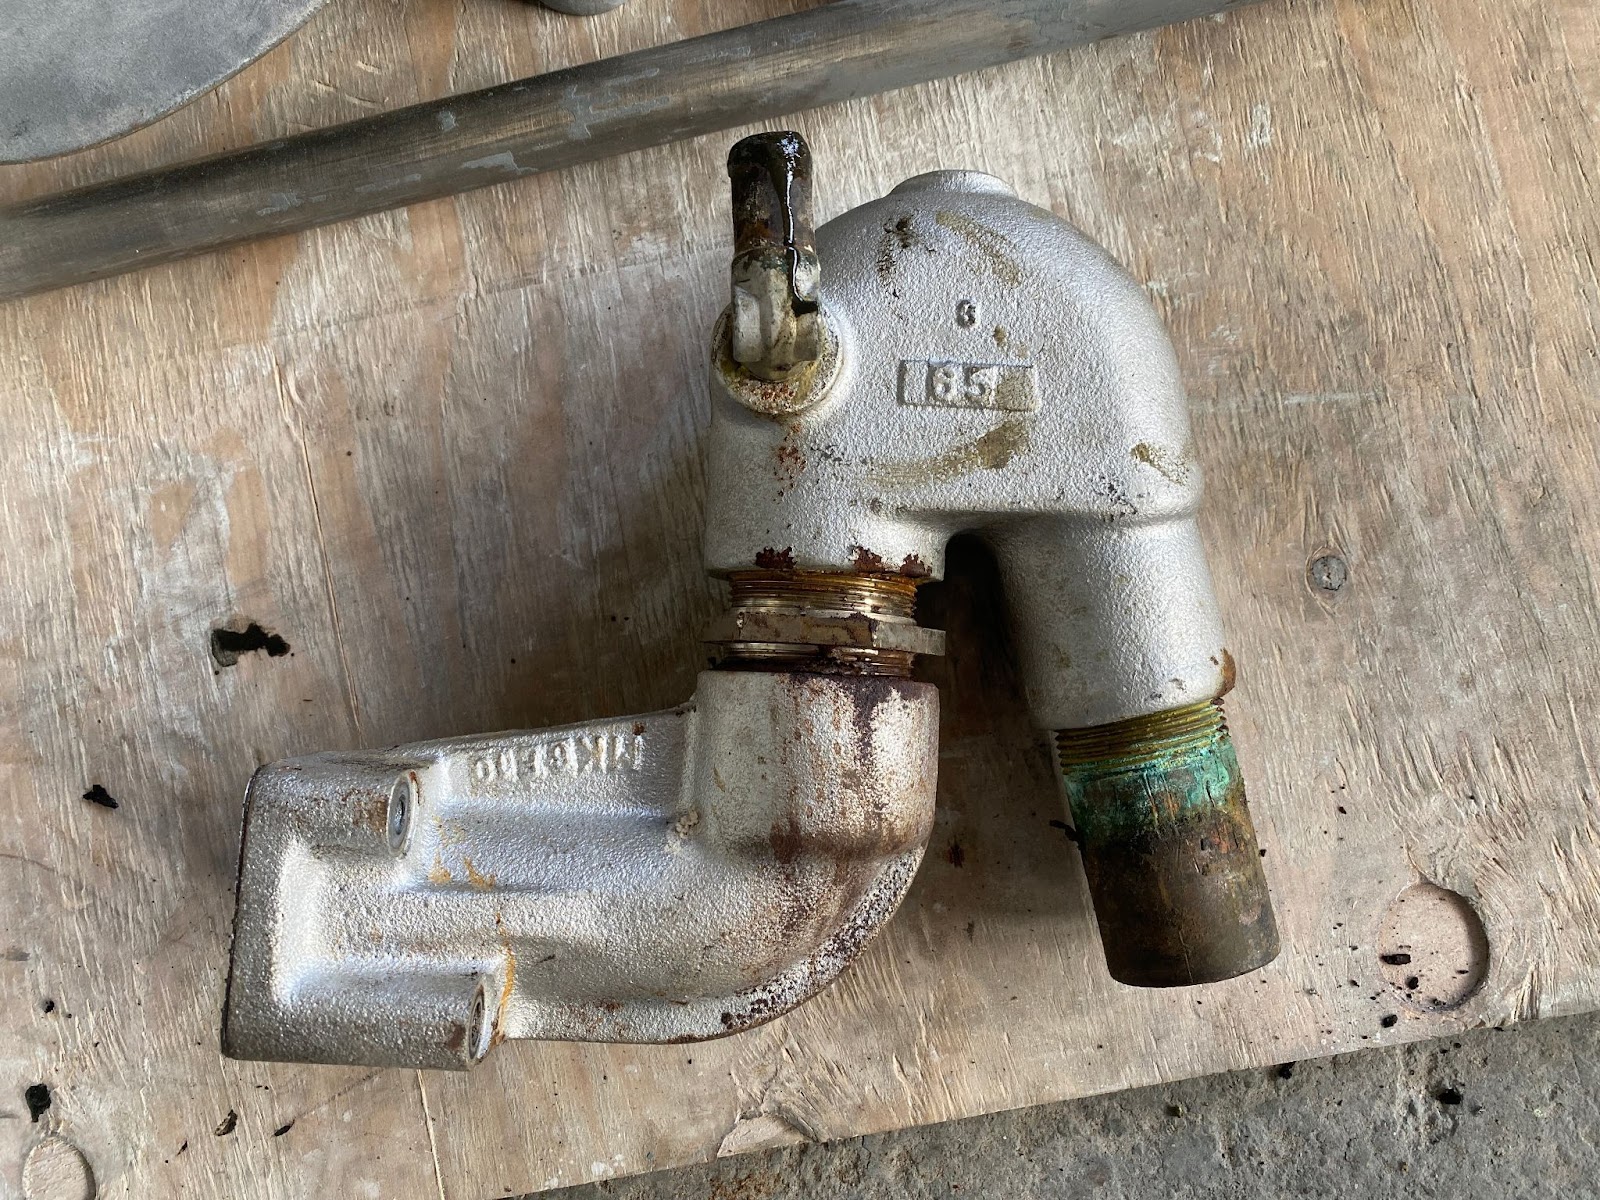
I would like to disassemble further, but my tooling is somewhat limited, and when I am working with an 18” pipe wrench, I know I have the potential to do more harm than is merited for an edifying inspection of an engine part that has never been a problem. I’m going to put some vinegar in it for a while and hope that cleans out some corrosion and then bolt it back on the engine. I bought a new gasket for the connection from the dry elbow to the engine block.
Engine Mounts
I thought I should replace the original engine mounts before the engine goes back in. The yard agreed this would be a good idea. I thought I could disassemble them, sand prime and paint and buy new rubber bumpers.
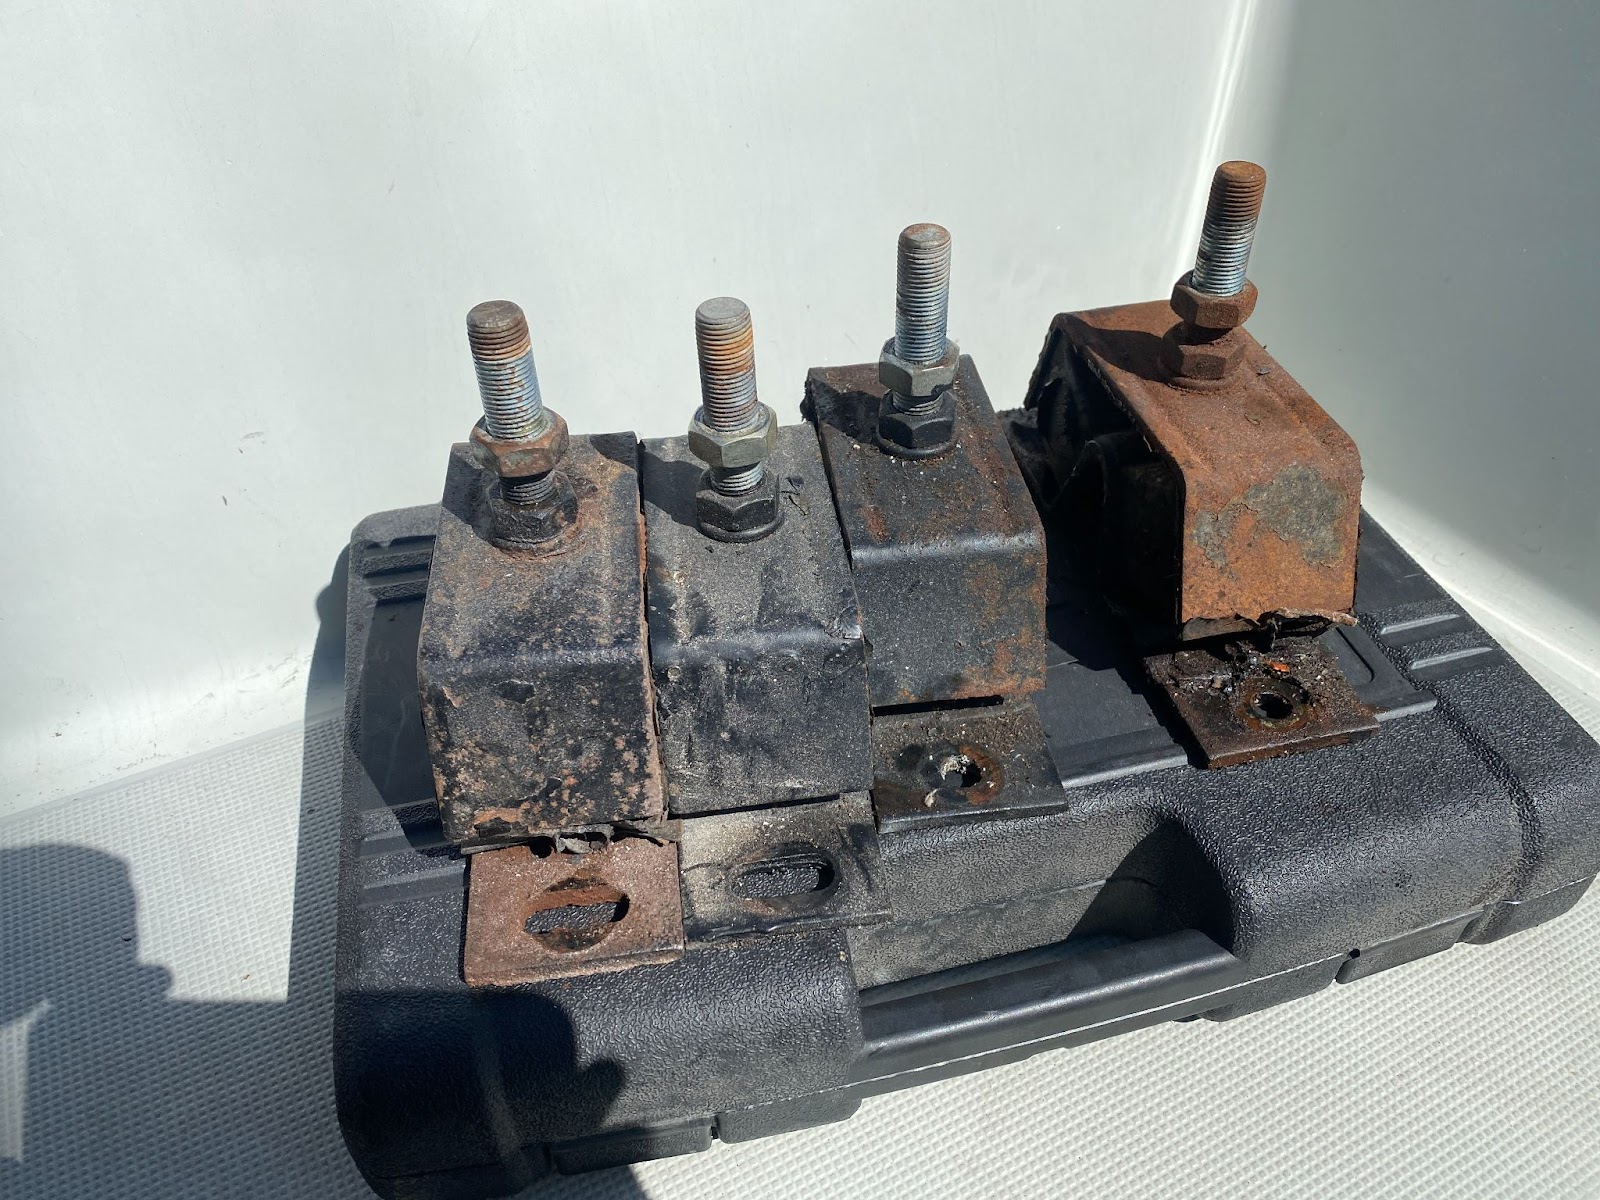
It turns out that the entire mount (bolt, two metal arches and the sandwiched piece of rubber in between) is sold as one unit. I was thinking maybe $40 each? Nope. $200 each for new ones.

I’m not sure if $800 for new engine mounts is “worth” it, but this won’t be a point of debate when it comes time for the yard to put the engine back in the boat and line it up with the prop shaft. They’ll have the best look possible.
The two front mounts are rated at 100lbs and the two rear ones at 75lbs.
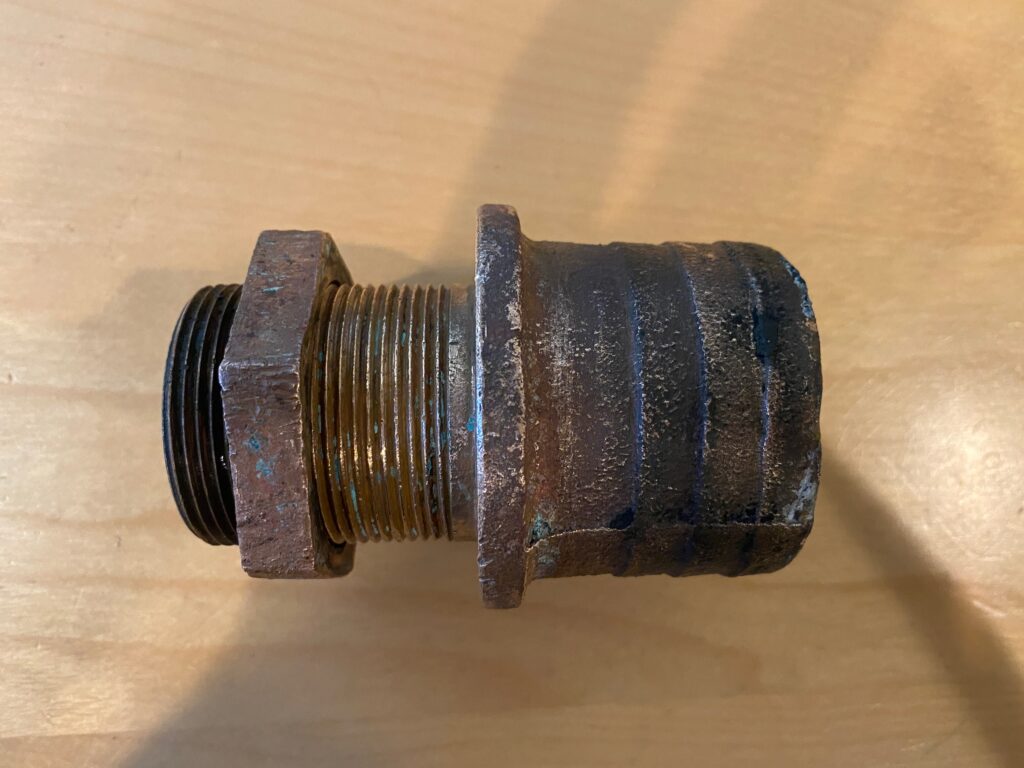
Fuel Shutoff Bracket
This small rusted bracket serves as the terminus for the fuel shutoff.
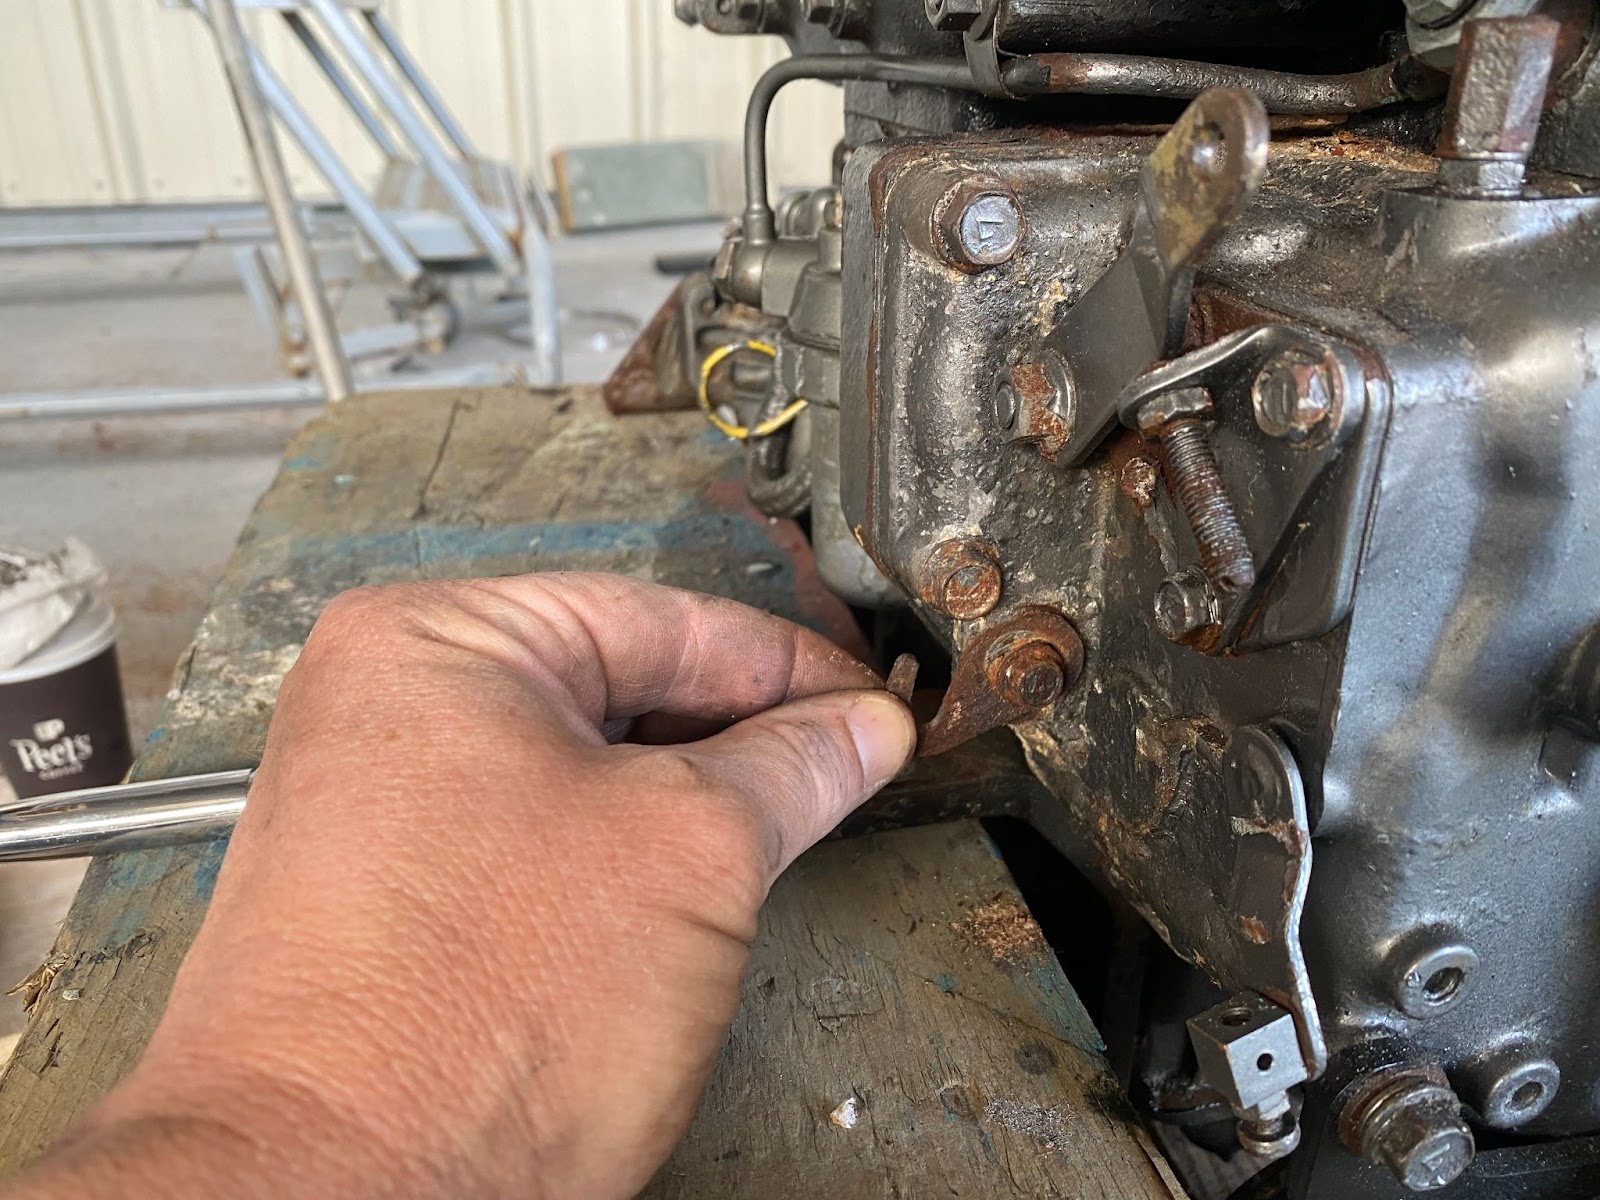
Removed and repainted with rust-inhibiting spray paint.

Stuffing Box Cleaning
If there was any doubt about a sense of humor on the part of the sailing gods, after a couple of long afternoons belly-down wrestling to liberate and change out packing flax in my propeller shaft stuffing box, removing the engine has provided an excellent opportunity to dunk the bronze piece in vinegar and get it properly cleaned up. Removing the old flax etc. would have been much easier had I tackled the job now, with the running gear disassembled. But I’ll have a properly cleaned-up stuffing box to put back into the boat.